30 Must-Have WordPress Plugins

WordPress has made it possible for anyone to create their own website without much effort. Since the arrival of WordPress, it has been considered as one of the most reliable and trustworthy website builder software for both big and small businesses. If we start counting the reasons why WordPress is important for your business or why you should use it, then the list is going to be endless.

The WordPress website builder is the most powerful and competitive content management system (CMS) and what makes WordPress best is its flexibility and ease of use. The popularity of WordPress can be estimated by the fact that more than 33.2 % of the websites on the internet are powered by WordPress website builder.

Not to forget the fact that WordPress is free software that doesn’t charge you anything for creating a website enriched with thousands of WordPress plugins and WordPress themes.

WordPress Plugins are just like apps that help you to add more custom functionality to your WordPress website. With the help of WordPress plugins, you can simply add more value to your website via advanced features like analytics, membership areas, contact forms, etc. WordPress plugins are an integral part of the WordPress ecosystem.

On WordPress, you can simply find thousands of free premium plugins with the help of which you can easily create a great website.

What Are WordPress Plugins?

WordPress plugins are just like small software apps that are inserted on the top of WordPress software and let you add new features and enhancements to your WordPress website. Currently, there are more than 48 thousand WordPress plugins available on WordPress. WordPress plugins made it possible for WordPress to transform into a powerful content management system.

Not just this, you can improve the SEO of your website, boost your performance, add social media buttons, and create galleries with the help of WordPress plugins.

Now that you are well aware of WordPress plugins and their functions, let us have a look at the top 30 WordPress plugins that can help you make an outstanding and extraordinary WordPress website.

Top 30 WordPress Plugins

1 – HubSpot

If you have ever used in-bound marketing, you must be aware of a familiar with the name, HubSpot. If not, then keep scrolling. Hubspot is the one-stop destination for all the needs of your WordPress website’s Lead management. Hubspot is an all-in-one marketing plugin that can help you organize, track, nurture, and boost your leads and customers on the WordPress website.

HubSpot plugin connects your WordPress website with HubSpot CRM which helps you in attaining visitors’ information on your website.  HubSpot plugins also have the live chat and bot builder feature that can help you in engaging more customers.  Hubspot built-in analytics helps you to see the report of your email campaign and its success.

2 – Defender

Defender is one of a kind WordPress security plugin, which is enriched with features that can protect your website from hackers and not attacks. The defender WordPress plugin makes your website experience safe and secure. 

Defender comes with features like a one-step website hardening to save you from future hacking attacks and security tweaking, Google verification, IP Blacklist manager, WordPress core files scanning, and rehabilitation. With the help of the Defender WordPress plugin, you can also enable scheduled scans.

3 – Hummingbird

Hummingbird is an efficient and lightweight WordPress plugin. To win the Google ranking game, your website needs to be as fast and responsive as it can be. Hummingbird WordPress plugin is here to help your website fly faster!

Hummingbird provides you, world-class caching, that can help your website pages load faster and browse cache tools. It also comes with performance reports that can give you pro tips that you can implement on your website to make it speedy. With the help of this WordPress plugin, you can simply minify, combine, defer, and compress.

In a nutshell, Hummingbird turns your website into a lenient, efficient and high-speed machine!

4 – Jetpack

Jetpack WordPress plugin can be considered as a whole package of powerful features regarding the security performance and website management of your WordPress website. In fact, it also offers content management tools,  social sharing, related posting section, posts via Email, and spam-free comments. With the help of the Jetpack WordPress plugin, you can certainly increase visitor engagement and responsiveness to your WordPress website.

5 – Akismet

Comment spam is one major issue that most of the WordPress websites deal with. But the WordPress website builder and WordPress developers are always there to help you out. With the help of the Akismet WordPress Plugin, you can easily filter out that comment that looks like spam. In fact, Akismet itself checks out the comment section of your website.

6 – Google XML Sitemaps

Google XML sitemaps are one of those WordPress plugins that your website essentially needs so that search engines like Google can easily rank your blogs.

What Google XML sitemap does is to create an XML sitemap for your WordPress website. It makes the structure of your website clear and as a result, search engines are notified every time you publish a post.

7 – iThemes Security

Just like the name suggests, iThemes Security is a WordPress plugin that insures to pick the common holes in your WordPress website from security attacks.  there is a possibility that many times WordPress administrators are unaware of the fact that their website has vulnerabilities. iTheme security functions in order to help and protect your website from such vulnerabilities.

8 – Forminator

Forms, polls, and quizzes are an important part of a website because they are the ones who help in increasing engagement and customer interaction on your website. So, here WordPress presents you to a well-packaged WordPress plugin, Forminator.

Forminator is a free WordPress plugin through which you can easily create polls forms and quizzes. It is integrated with other apps like Google Sheets and Zappier. Other than this, Forminator has features like scoreless styling, conditional logic, and calculations. You can build your own custom extension with the best strong API of forminator.

9 – Snapshot

When we say WordPress website builder is incredible we don’t lie. WordPress plugins even cover the backup area of your website as well. Snapshot WordPress plugin allows you to restore your website data through backup. In case you lost your backup, it got corrupted or accidentally deleted, Snapshot Pro even keeps backup of your backup. A snapshot saves your backup to multiple locations like Dropbox, your computer, Amazon S3, Google Drive, etc.

10 – SmartCrawl

SEO is that one thing that can take your website from zero to top on Google SERP. Well, that’s true that every website administrator works hard to get visitors to their websites. You must be implementing all SEO practices but it is crucial for you to know about a SmartCrawl WordPress plugin and how it benefits to improve your website SEO.

Whenever your website publishes important content that needs to be notified early, this plugin does the job of informing web crawlers that your website has important content. Other than that SmartCrawl is flexible, easy to use, customizable, create a sitemap, and also adds automated keyword linking.

11 – W3 Total Cache

User experience is one very vital entity for the success of your website. With the help of the W3 Total Cache WordPress plugin, you can enhance user experience and boost the performance of the server of your website.

This WordPress plugin is designed in a way so that it can expand your loading speed that will ultimately modify the user experience. W3 Total Cache WordPress plugin curtail download times and intensify the performance of your server.

12 – Beehive

Once your website gets popular success is not far away. But that popularity can only be gained through analyzing visitor engagement. Google Analytics is a great tool for such analysis. Beehive is a WordPress plugin that delivers the exact analysis from Google Analytics to your WordPress website dashboard. With the help of such influential data insights and reports by Google Analytics, you can efficiently track page visits, bounce rate, page views, and referred. You can even analyze the shopping behavior of your customers and the demographics of your website.

13 – Branda

Branding of your website is an integral step towards attaining more customer engagement on your website. Branding is as important as your services and products because it creates a sense of professionalism.

With the help of Branda WordPress plugin,  you can create your own logo customize your admin panel, footer, dashboard, and create your own company name for better reach. So, ultimately, Branda is the only branding plugin that you need for your WordPress website to twist it into your company’s website.

14 – Smush Pro

Imagine reducing the size of the image without compromising even if even the slightest with the quality of the image! Well, that means a fast loading website with high-quality images!

That is what the award-winning WordPress plugin Smush Pro does for your website. it saves the storage on your website and increases the loading speed of your website. Smush pro has been titled as the best Image Compression and Image Optimisation WordPress plugin.

15 – Contact Form 7

As the name suggests contact form 7 is a WordPress plugin that easily allows you to add contact forms with the help of shortcodes to your WordPress website.

With the help of contact form 7, you can easily add, manage, or create multiple contact forms and you don’t even need to do the extra coding.

16 – Broken Link Checker

Well, I think you already know what this plugin does. Just like its name is Broken Link Checker, this WordPress plugin does the scanning of your website and fix the broken links founding your posts, pages, comments, etc. Any kind of redirects missing images or broken links can’t hide from this incredible WordPress plugin.

17 – Duplicate

The main function of “Duplicate” is to duplicate, move, and transfer the website from one place to another. It often happens many times that you need backup or moves your entire WordPress website to another location. Well, duplicator WordPress plugin can get this done for you.

You can also consider duplicator as an easy utility WordPress tool that can keep the backup of your website.

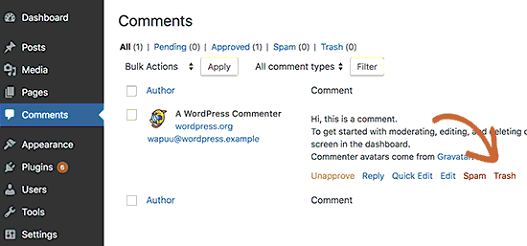
18 – Disable Comments

Disable comments WordPress plugin helps you to disable comments on your posts, pages, blogs, or attachments. It allows WordPress administrators to easily get control over the comment section of the website. No matter if you want to disable comments on a particular post or on the entire website this plugin can help you with both.

19 – Relevanssi

Even the default search option of your WordPress website can be replaced or changed. Yes, you heard it right. Relevanssi, a WordPress plugin, can help you. You can easily customize to do fuzzy matching on partial words via this WordPress plugin. The free version of this WordPress plugin can help you control a single website but the premium version can help you control multiple websites.

20 – Easy Updates Manager

Easy Updates Manager helps you to handle updates on single-site and multi-site WordPress installations.

Quick Updates Manager helps you to handle all your WordPress updates for a single site or Multisite installation. There are tons of settings included in the plugin that make it highly customizable.

Apps provide options to automatically update major and minor releases of WordPress. Site administrators may also choose to upgrade plugins, themes, and more automatically.

21 – Redirection

In order to improve the ranking of your WordPress website and reduce the rate of visitors landing on error. Make use of the Redirection WordPress plugin.

In case you are moving pages are changing the directory instructions of your WordPress website then this WordPress plug-in can be very useful to you as it keeps in an account of 401 error and manages 301 redirects.

22 – Regenerate Thumbnails

Well, I think now it’s easy to guess what’s the role of this WordPress plugin. So, Regenerate Thumbnails is a WordPress Plugin that regenerates the thumbnails of the images on your WordPress website. Be it individual images, upload images, or separate images, you can regenerate the thumbnails of any of them with the help of regenerate thumbnail WordPress plugin.

23 – TablePress

With TablePress, which uses a shortcode, you can easily create tables that can be embedded into posts, pages, or text widgets. Since table data can be inserted directly into a spreadsheet interface, no special coding is required.

Tables can contain any data type, including formulae. Sorting, pagination, and filtering provide extra TablePress features. Tables can also be imported and/or exported from/to the formats Excel, CSV, HTML, and JSON.

24 – Photo Gallery

Gallery gives tools that help you add and edit images that are 100 percent responsive to different views on your site. Within WordPress, you can easily add photo galleries and albums to posts and pages as well as multiple widgets.

The plugin can also make renaming, downloading, deleting, and copying images simple in just a few steps. This tool can also add Photo details and tags.

25 – Yoast SEO

SEO lets you get more visits to your website from the search engines. Although WordPress is SEO friendly out of the box, there’s so much more you can do to increase traffic on your website using the best SEO practices.

Yoast SEO is one of the most popular plug-ins in WordPress ever. Yoast provides the most comprehensive solution out of all the WordPress SEO plugins, with all the functionality and resources you need to boost your on-page SEO.

It helps you to add meta tags, create sitemaps, connect your website to the Google Search Console, optimize it for social media, and more.

26 – MonsterInsights

MonsterInsights is the best WordPress plugin in Google Analytics. It helps you to link your website to Google Analytics “correctly,” so you can see precisely how people find your website and use it.

The best part is that the WordPress dashboard shows you all the relevant stats that matter right inside.

Then you can customize your website to increase your traffic, subscribers, and revenues accordingly. We have comprehensive guides on how to install Google Analytics in WordPress, how to use Google Analytics to enable tracking eCommerce, and how to track user engagement.

27 – Constant Contact

Constant Contact is among the second most prevalent providers of email marketing services.

Their platform helps you to create a mailing list and give your subscribers beautiful email newsletters.

It gives non-techy users a fast and easy setup. This also works well with common WordPress plugins like OptinMonster and WPForms for lead generation.

28 – Shared Counts

Shared counts are the best social media plugin in WordPress which helps you to easily add beautiful social sharing buttons to your website.

It also shows share counts, which lets you add social proof to your website.

While there are several paid solutions available, this free plugin beats all of them in terms of consistency and performance of code.

29 – Insert Headers And Footers

You may need to attach code snippets to your WordPress header or footer often when running your WordPress site for verification, adding scripts for re-targeting ads, etc.

Insert Headers and Footer help you to quickly add snippets of code to your WordPress site without changing files on your theme. Take a look at our WordPress tutorial on how to add header and footer code.

30 – SEMrush

SEMRush is an all-in-one marketing toolkit intended for digital marketers and business owners. Helping you boost your SEO, paid traffic plan, social media, and marketing & PR plan comes with powerful tools.

This also lets you collect your rivals’ strategic intelligence so you can circumvent them and conquer the business.

This lets you do keyword analysis, backlink audit, monitor brand mentions, spy on rivals, discover best performing social media posts and accounts, evaluate ad strategy, and more.

Conclusion

We hope that now that you are well versed with the list of the topmost WordPress Plugins that your WordPress website must.

If you have any more outstanding WordPress plugins in your mind then let us know below in the comment section.

Read More
Anand Agarwal February 11, 2021 0 Comments

45 Important things to do immediately after installing the WordPress site

1- Set Up Site Title, Tagline, and Timezone

First change the site title, tagline, and timezone settings. Simply head over to Settings » General page and change these settings.

The Title and the tagline are one of the essential elements that identify your website, and tell people and search engines what your website is about.
The Title works as the name of your website. It’ll appear in the title bar of the browser and is usually (depends on the theme) displayed in your site’s header.
The Tagline is a short description that explains what your site is about. Think of it as a slogan that completes the Site Title. It appears next to the Title in the browser’s title bar.
Replace the default tagline “Just another WordPress site” with your tagline.

2 – Enable User Registration

You need to decide if you are going to have a multi-author blog.
To allow this, tick off the “Anyone can register” box, and set the “New User Default Role” as “Contributor”.
If you don’t want people to register, don’t tick the “Anyone can register” box.

3 – Set WordPress Discussion/Comments Settings


Go to Settings » Discussion.
Most of the settings are self-explanatory here.

4 – WordPress Media Settings

This setting will greatly improve the way WordPress handles images.
By default, WordPress create multiple sizes for every uploaded image. This is not a good practice. This will load up your blog with unnecessary files and your blog will quickly become bloated.
Go to Settings » Media, and use the below screenshot to configure the proper settings:

Also, add a plugin which compresses images as they’re uploaded.

5 – Set the WordPress Address URL and Site Address URL

The WordPress address can be with or without the “www” bit. It’s crucial that what you choose here is the same as your preferred setting in Google Search Console.
For example, if you choose “yourdomain.com” without the “www” bit, and someone tries to navigate to “www.yourdomain.com”, it will redirect to “yourdomain.com”.
In Google Search Console, you need to make sure that you configure the preferred domain to be the same as what you configure in your WordPress admin dashboard, in this case “yourdomain.com”. Google will then display that preferred domain in the search results.
The site address URL should be different if you want your WordPress installation to be different from your website’s actual home page.

6 – Configure the Front Page Settings

The home page of your new WordPress site can be either a custom made page, or it can simply be a summary of the latest blog posts.

When you’ve just installed WordPress, you won’t have any content so this setting isn’t all that important yet. But it’s good to know that this setting exists.
Once you have your home page designed and created then you can revisit this setting and select the Front page from here.

7 – Change the Blog Permalink Structure

The permalink settings determine what the URL structure will look like for your permalinks and archives.
For example, you can choose to have the day, month and year included in the blog post URL. Or you can have a numeric value instead of the blog title in the URL.

The best option? Just the post name. No dates or numeric values. Unless you find the date to be useful for your readers, there is no benefit to have this included in the URL.
Numeric values are even worse, because they don’t mean anything. In addition, the search engines will frown upon it too.
In general, search engines like short and descriptive URLs.

8 – Set Your Timezone, Date and Time Format

In Settings » General you’ll find the options for Timezone, Date and Time Format.
Choose a city in the same timezone as you are or a UTC option if you don’t find your city. Now your posts’ time will be synchronized with your actual timezone and your posts scheduling will work as you expect.
Date and Time format settings control the way they’re displayed in your site. They usually appear as the metadata of your posts and tell the visitors when were the posts published or updated. You can choose one of the preformatted options or generate a format of your own.

9 – Install a WordPress Theme and Uninstall Unused Themes

By default, a WordPress installation comes with several free themes. One of these free themes will be the one that is activated.
Choosing a theme is an important step because a theme has a huge impact on the success of your WordPress site and blog. A theme should match your expectations in regards to look and feel. A theme should be a good reflection of your brand. In addition, a theme should be well-programmed and regularly updated.
You can either keep using a free theme, or you can decide to purchase a premium theme. It’s important to delete any themes that you’re not using, as they can make your website a lot heavier. Just like with plugins, only use what you really need. In other words, you should really just have one theme installed.

  • Install and Activate Your Theme

When using an external theme, one you downloaded or purchased outside of the WordPress themes repository, you’ll need to upload it by following one of these options:

  1. a. Upload through WordPress: From the WP menu go to Appearance » Themes » Add New » Upload Theme. Then, choose the [theme-name].zip file.
  2. b. Upload through FTP: Unzip the [theme-name].zip file and upload the theme folder using your preferred FTP client into the wp-content/themes at your domain.

Once you have uploaded the theme click Activate (Appearance » Themes » Your uploaded theme).
Another option is to look for a theme in the WordPress Theme Directory, which has a collection of themes you’ll be able to install right from your dashboard.
Navigate to Appearance » Themes » Add New, and you’ll see the available themes from the repository. Just select the one you like and click Install.

  • Remove Unused Themes


WordPress comes with its own default themes known as the Twenty-Something series. After you install and activate the theme you’re going to use, do not leave other themes occupying the space in your install folder. Delete all other themes.
Go to Appearance » Themes, click on the theme you want to remove. It’ll open a lightbox, and on the bottom right corner you’ll find the Delete link.

10 – Upload a Favicon

A favicon is an icon that represents your site across the web and devices. It’s a part of your site’s visual identity and helps people to easily and quickly recognize your website.
Since WordPress 4.3, you can add a favicon (or a Site Icon) from the WordPress dashboard.
Go to Appearance » Customize » Site Identity tab. Click on the select file button and upload the image you want to use as site icon.
According to WordPress, icons must be square, and at least 512 pixels wide and tall.

11 – Remove Sample Content

When you install WordPress on your domain, you’ll notice it comes with a sample post (the famous “Hello World!”) and a sample page created. That’s so you can already see something in your site instead of seeing it kind of empty and broken. But we never use these sample content.
Instead of leaving them there and taking a chance on forgetting they even exist when your site is ready, go and trash them right away.
To remove the sample post: go to Posts and hover on the Hello World post. You should see the Trash link. Click on it, and then go to “Trash”, hover the same post and hit Delete Permanently.

To remove the sample page: go to Pages and hover on the Sample Page page. You should see the Trash link. Click on it, and then go to “Trash”, hover the same post and hit Delete Permanently.
Lastly, visit the Comments page and then delete the default comment.

12 – Add Categories and Change the Default One

The default posts category when you install WordPress is called Uncategorized.
If you don’t set a specific category for the posts you create, they will automatically be archived under the default category.
To change the default category name go to Posts » Categories, hover on Uncategorized and click Edit.
Don’t forget to change its slug as well.
If you already have some category names in mind then create them now. That way you’ll be able to plan the editorial categories in advance, and won’t need to figure them out while writing a new post and the time to assign it to a category comes.

For that, go to Posts » Categories and add them right there. If you want, you can write a description for each one. Some themes will display that description in the archive page, and it’s also a good thing for your SEO.
After that, go to Settings » Writing page. Here you will see the default category option, you can go ahead and select the new category you created earlier.

Finally, you can go to Posts » Categories page and delete the ‘Uncategorized’ category.

13 – Change Default Widgets on Sidebar

Most themes usually come with at least one widgetized area that is usually the main sidebar displayed next to your posts. Other themes may come with more sections for widgets like the footer.
By default, WordPress places some widgets on the main sidebar: Search, Archives, Recent Comments, Recent Posts and Categories widgets.
You can decide if you are going to keep these widgets or what exactly you want to put there. For that, navigate to Appearance » Widgets and change the default settings.

14 – Create a Custom Menu

By default, most themes will take the existing pages on your site and place their links in the navigation area in your site. But this is not the prettiest way to build a navigation menu for your website.
The Menus screen found under Appearance » Menus enables a user to create custom navigation menus and place them in different locations over the site.

    • Creating a Custom Menu instead of leaving the default page links in your header will let you:
  • Drag, order, reorder and rename menu items.
  • Create sub-menus.
  • Create menu items that are not pages, like custom links, posts and categories.
  • Use, afterwards, the same menu on different places, like widgets.
  • Customize the menu items by playing with the Link Target, CSS Classes, Description.

15 – Change Default Admin User

Make sure you change the admin username to a unique one. Leaving the admin username may be disastrous for the security of your site.
Also change your password to a more complex one.

16 – Complete Your Profile

Make your WordPress profile match who you are.
Go to Users » Your Profile. There you’ll be able to enable/disable the Visual Editor when writing posts and pages, to select an Admin Color Scheme, to decide if you want to show or not the Toolbar when viewing your site.
You can fill in your details and decide how to show them.
Insert your first and last names, and then select a “Display name publicly as…” option.
This will apply to every place in your site where your name is displayed: author archive page, author name in posts, user name in forums, etc.
You can also add your Contact Info and a Biographical Info. Depending on the theme, these may show up in different locations.

17 – Get a Gravatar

Your name, contact info and bio are set up. But what about having a profile picture?
WordPress uses a specific type of avatar called Gravatar (Globally Recognized Avatar). Gravatars follow you around the web and automatically appear when you post a comment on a WordPress site or sign up on a WordPress site with your email account.
To create your Gravatar go to gravatar.com. You’ll be able to register an account based on your email, and upload an avatar to be associated with the account.

Depending on the theme, Gravatars may be displayed next to your author info in a post you wrote, on a comment you made or a forum topic you’ve responded.

18 – Add Other Authors

Navigate to Users » Add New and create the profiles for more authors. You’ll be required to fill in Username and Email.
A Password will be automatically generated for you.
In the same screen, you can decide if you want to send the new user an email notification about their account and the role he/she is going to have in your website.
Remember that the email address you set is the one that brings the person’s Gravatar, so you may want to use for your authors the email that they use for their account at gravatar.com. Or you can use another email address but then remind them to add that email to their Gravatar account.

19 – Delete Unused Default Plugins

WordPress comes with two already installed plugins: Hello Dolly and Akismet. Delete the Hello Dolly.
Sometimes when getting a WordPress installation from your hosting service, there might be other plugins installed already. Make sure you check them out and see if you really need them. If not, remove them from your site.

20 – Install Anti-Spam Plugins

Spam comments can be quite problematic. Most of them contain links to malicious websites known for distributing malware. Spam comments can affect your search rankings and your website’s reputation.
You can enable “comment moderation” in WordPress to prevent any comment appearing without approval. However, as the quantity of spam grows you will be spending considerable time moderating comments. You can avoid it by installing some useful plugins.
Akismet
Akismet is a plugin that checks your comments to see if they look like spam or not and lets you review the spam it catches under your site’s “Comments” admin screen.
It comes already installed with your WordPress installation. You’ll need an Akismet.com API key to use it which is free for personal sites. Activate the plugin and fill in your API key.
Antispam Bee
Another popular solution to fight spam. This free plugin will help you block unwanted comments on your site.

21 – Install SEO Plugins

Yoast SEO
One of the best and most complete Search Engine Optimization solutions for WordPress. The Yoast SEO plugin guides you through some of the settings needed in order to optimize your site. It’ll help you write better content that cares for keywords and readability. It’ll also generate a sitemap of your site.
Google XML Sitemaps
If you didn’t install Yoast SEO or if your SEO plugin doesn’t automatically creates a sitemap, install Google XML Sitemaps. This plugin will generate a special XML sitemap which will help search engines to better index your site by understanding its structure. In addition, it notifies all major search engines every time you create a post.

22 – Install Analytics Plugins

Google Analytics
Every site, as little as it can be, needs statistics. Google Analytics is a free service that tracks all sorts of insights about your website’s visitors, so you can improve wherever necessary to get better results and keep them coming back.
First, create an account at Google Analytics, and then add Google Analytics code on the website.
if you are not using a custom developed theme, then you can get a plugin that will install the code for you. These are few options:
Google Analytics by MonsterInsights
Google Analyticator
Google Analytics

23 – Install Cache Plugins

Caching is the best way to optimize WordPress sites.
WordPress is a CMS that serves dynamic websites; every time a page is loaded the server needs to process it all over again. That means the page is going to consume a specific amount of server resources which will affect the load speed, and the amount of pages that can be served at any specific time.
When you use caching the server returns a “static page” for the requested URL, which uses way less resources and improves both the loading speed and the amount of pages per minute you can serve.
Unless your site runs on a server that is already using some way of caching and even then, plugins are the fastest way to get started with caching.

Some popular cache plugins are as follows:

  • WP Super Cache (WP Super Cache) is the most popular option between cache plugins. It’s pretty straightforward to setup and has really good speed results (achieved by the technologies it uses to cache the pages). On the downside, the most optimized part of this can’t be used for logged in users. If you don’t need to present content to logged in users, this plugin might be the one to go with.
  • W3 Total Cache (W3 Total Cache) has similar performance results than WP Super Cache but with a much more complicated setup environment but it has a lot of advanced options that will let you modify almost everything in the way it works.
  • WP Rocket (WP Rocket) (Paid one) is the one of these three that has the fastest results according to several benchmarking tests. The setup is extremely easy and -probably as a consequence of being a paid one- it has a really good support team behind.

24- Install Security Plugins

WordPress itself is a very secure platform. However, there’re some plugins that can help in adding some extra security to your site. And if unfortunately your site gets hacked and you need to recreate it, it’s always a good idea to have regular backups of your database nearby.

  • The Wordfence (WordFence) security plugin provides free enterprise-class WordPress security, protecting your website from hacks and malware. The plugin scans your site and alerts you quickly if your site is compromised.
  • All In One WP Security (All In One WP Security) is a free, comprehensive, user-friendly, all in one WordPress security and firewall plugin. It reduces security risk by checking for vulnerabilities and by implementing and enforcing the latest recommended WordPress security practices and techniques.

25 – Install BackUp Plugins

  • WordPress Backup To DropBox – This free plugin keeps your WordPress website, its media and database backed up to Dropbox on a regular basis. You can choose a day, a time and how often you wish your backup to be performed, and where it’ll be saved within Dropbox.
  • BackupBuddy – It allows you to easily schedule daily, weekly, or monthly backups. It can also automatically store your backups in Dropbox, Amazon S3, Rackspace Cloud, FTP, Stash (their cloud service), and even email it to yourself.
  • UpdraftPlus -UpdraftPlus is a free WordPress backup plugin. It allows you to create complete backup of your WordPress site and store it on the cloud or download to your computer.

26 – Install a Social Media Plugin

Whenever you publish new content, you want to make it easy for people to share. There are several social sharing plugins you can install.

  • Sassy Social Share – Sassy Social Share is an easy to use social media plugin for WordPress with tons of options. It comes with support for many different social media websites, and you can add buttons in post content as well as a sticky floating social menu.
  • Shared Counts – Shared Counts is a fast and easy to use social media plugin for WordPress. There are multiple button styles, and you can choose where to show the button (before or after the content or manually).
  • AddtoAny – AddtoAny is a social sharing tool also available as a WordPress plugin. It offers many social media platforms, floating and standard social sharing bars, and a universal sharing menu.

27 – Setup Related Posts Plugin

The related posts plugin will help keep visitors on your website longer, by showing them related content.
As you start creating more unique content they will browse the related posts. This in turn will improve your bounce rate.
You can use Related posts for WordPress (https://wordpress.org/plugins/related-posts-for-wp/) or WordPress Related Posts (https://wordpress.org/plugins/wordpress-23-related-posts-plugin/)

28 – Internal Link Checker

We need to make sure that links in blogs are not broken, otherwise it can impact SEO badly. There are plugins like Broken Link Checker, which can automate this process.
It scans your blog, and if it detects any type of broken links or images. It notifies you via your dashboard and email. You can then take action and correct the issue.

29 – Setup a Contact Form

The visitors of your website may want to contact you. So, make it simple for people to reach out to you.
Contact Form 7 is a free and popular WordPress plugin with more than a million downloads. You can use it to create a simple contact form.
The Contact Form 7 allows you to create fields like email addresses, names, subjects, and messages. You can even add captcha to prevent spammers from filling the form.

30 – Optimize Images

High-resolution images have a major impact on load time. They slow down page speed because of their large file size. It is advisable to reduce the image size without losing the quality. Optimizing images also boosts your SEO.
To solve this issue, Image Optimization plugins come to rescue. They compress images, thus optimizing them. To name a few of them: EWWW Image Optimizer, WP-Smush, Short Pixel Image Optimizer, Imagify.

31 – Brand Up Your Login Page

It is a good practice to put your brand on Login page. It gives a more professional look to the site.
Changing the WordPress logo above the login form
There are many ways to do that:

  1. With a plugin: Uber Login Logo or Custom Login may be good options.
  2. Through custom code: Learn about it here.

32 – Modify Your Footer

Depending on the theme you choose to use, you can modify your footer.
You can add copyright date, authors, company name as well as links to your affiliate disclaimer and privacy page.

33 – Setup Google Webmasters

This is a very useful tool to see if your website has any type of crawl errors and security issues.
Google will even show you how many pages are indexed in the search engines.
Head on over to Google Webmasters and create an account.
You will be asked to verify your domain to prove you are the owner. Choose your method of verification and follow the prompts.

34 – Add RSS to Feedburner

Really Simple Syndication or RSS is way to syndicate your content. This makes it easy for people to read it in their mailboxes, feed reader or other devices.
You can use Google Reader, it’s a free service and extremely easy to setup.

35 – Create Your About Me Page

When you start blogging no one knows who you are. It’s up to you to show them, this is where the about me page comes in.
Don’t forget to add some pictures of yourself. People want to get to know you and find out if you’re trustworthy.

36 – Create A Privacy Page

The privacy page allows people know what you are going to do with their data. A privacy page is important to add to your WordPress blog.
It is now more important after the European Union’s GDPR law.
There are several plugins you can use to create a terms of service and privacy page, for example you can use this free plugin. After you create the pages, delete the plugin as you won’t need it anymore.
Don’t forget to write a blog disclaimer for your blog, so you can be protected legally.

37 – Install Login Limit Plugin

Another great thing you can do for your WordPress blog is to install the Limit Login Plugin. This plugin will block hackers from continually attempting to login to your site.
It will lock out anyone who is unsuccessful of logging into your account after a certain number of times.

38 – Create A Child Theme

Before you start making any real changes to your WordPress blog, be sure you create a child theme. A child theme will protect your WordPress blog from losing any of the CSS styles you add to it.
Some examples of the child theme creator plugins are: One Click Child Theme and the Child Theme Creator.

39 – Start Building Your Email List

Anyone who’s been online for awhile will tell you that their biggest regret is that they didn’t build their email list right away.
Don’t wait until you start getting traffic. If you start creating great content, you will eventually start getting visitors and you want to give them the option of signing up to your email list.
Some of the Email list plugins are GetResponse, ConvertKit and MailChimp.

40 – Change Or Delete Post Revisions

By default WordPress is setup to keep all your post revisions. It is a good practice to delete these revisions.
You can use plugins like, Better Delete Revision or Revision Control.

41 – Let The Search Engines Know Your Blog Is Live

Keep the search engine visibility off while you are Installing the WordPress, however when you are ready to publish then turn it back on to let the Google Bots know your content is ready to be crawled.

Head on over to your Settings » Reading and uncheck the box when you’re ready to go live.

42 – Populate WordPress Ping List

Whenever you publish a new post or update existing posts, WordPress automatically notify the site of your ping list which helps search engines pick up and index your posts faster.
Some important ping sites are as below:
http://blogsearch.google.com/ping/RPC2
http://bblog.com/ping.php
http://bitacoras.net/ping
http://blog.goo.ne.jp/XMLRPC
http://blogdb.jp/xmlrpc
http://blogmatcher.com/u.php
http://bulkfeeds.net/rpc
http://coreblog.org/ping/
http://mod-pubsub.org/kn_apps/blogchatt
http://www.lasermemory.com/lsrpc/
http://ping.blo.gs/
http://ping.bloggers.jp/rpc/
http://ping.feedburner.com
http://ping.rootblog.com/rpc.php
http://pingoat.com/goat/RPC2

Login to your WordPress dashboard. Go to Writing under settings tab and scroll down to update services and add all the above ping list.

43 – Disable Directory Browsing

WordPress blog by default has the Directory Browsing enabled. Directory browsing allows you to see folders and subfolders for your website.
If Directory Browsing is enabled hackers can find a way to your blog by browsing your directory looking for a way to sneak in through a plugin or theme which you have installed.
While some web hosting companies disables Directory Browsing by default. Your web hosting might keep this option up to you.
To test it, enter the below link into your browser. Be sure to use your domain name.
https://Yourdomainname.com/wp-includes/
If you see a list of directory files then you need to disable Directory browsing.
To disable directory browsing all you need is to edit your “.htaccess” file and add the below line code

Options -Indexes
Take a copy of your .htaccess file before you edit it

44 – Test your website on Mobile screens and various other screen sizes

For good user experience and good SEO score, it is important that your WordPress website is mobile responsive and work well on all the screen sizes.
Test your website on real mobile phone and other devices as much as possible.
Also please use screen simulator to cover wide range of screen sizes. For example, you can download a screen simulator extension “Screen Resolution Tester” from chrome web store and run your website on various screen sizes.

45 – Enable CDN for your Website

CDN helps you in storing your content on country specific servers. This speeds up loading time for your website.
You can try to activate CloudFlare for your website. It is one of the best CDN available today.

Read More
Anand Agarwal December 10, 2020 0 Comments

Instagram Integration with WooCommerce

Instagram enjoys more than 75 million daily active users; this mass usage has resulted in extensive inclusion of the photo-sharing website in various business. Millions of business owners are currently leveraging the social media platform to their benefit, thereby increasing brand awareness and sales many folds with each year. And alike other E-Commerce platform users, WooCommerce also provides a one-stop, out of the box, alternate solution for the complex integration of Instagram to the WooCommerce store.

Manual integration for Instagram

Please follow the instructions on https://docs.woocommerce.com/document/shopping-instagram-woocommerce/

Requirements:

  • WooCommerce store with physical products
  • Instagram app for iOS or for Android – most current version
  • Instagram account with an approved business profile
  • Facebook Page catalog to link to Instagram business profile

Setup and Configuration

This guide walks you through setup of Shopping on Instagram with WooCommerce in steps.

Prepare your WooCommerce Store and Products

  1. Use the Setup Wizard (https://docs.woocommerce.com/document/woocommerce-setup-wizard/) to start a new store. Or ensure your current store is updated and ready for visibility on Facebook and Instagram.
  2. Add new products or manage existing ones. More at: Adding and Managing Products.
  3. Ensure that physical products to be promoted are in compliance with the Facebook Commerce Policy.

Create a Facebook Page and Catalog

  1. Go to Facebook and Create a Page for your Business.
  2. Go to Catalog Manager and Create a Catalog.
  3. Add products to your Catalog.
  4. Create a Product Set if there is a group of items you wish to promote together (optional; only if relevant).

Get an Approved Business Profile

  1. Be located in a country where Shopping for Instagram is available. Countries approved for Shopping for Instagram.
  2. Create a new Instagram account for your business. Or convert your personal account to a business account.
  3. Connect your Facebook Page Catalog to your Instagram Business profile in the app. More at: Connect a Facebook catalog with an Instagram Business profile.
  4. Wait for approval from Instagram. This process takes a few hours or days.

Once approved, a push notification appears.

Picking E-Commerce Plugin

Congratulations! It’s time to start tagging.

Picking E-Commerce Plugin

To start tagging products from your WooCommerce store in Instagram images:

Enable Product Tagging

  1. Use the Instagram app and go to your Profile.
  2. Select the Get Started alert or the gear icon.
  3. Go to: Shopping > Continue.
  4. Select a catalog to connect to your Business profile.
  5. Done.

Tag Products on your Instagram Posts

  1. Using the Instagram app, select a photo and add a caption, any filter or hashtag, as usual.
  2. Tap products you wish to tag.
  3. Enter names of products to tag, and select them as they appear in the Search box.
  4. Done.
  5. Share.

You can tag up to five (5) products in a single Instagram post or 20 products in a multi-image post.

More at: Tagging Products on Instagram Posts.

Picking E-Commerce Plugin

Tapping a tag on your Instagram post, a customer sees:

  • Image of the product via Facebook
  • Description of the product
  • Cost of the product
  • > Link that takes them to where they can purchase the product.

WooCommerce Plugin for Instagram integration

One such extension you can use for the integration of the most coveted social media platform is Instagram with WooCommerce. This Instagram WooCommerce Integration allows users to view the brands’ products through updates, pave way for easier linkage to website for better discovery and shopping experience for the target consumers, thereby increasing sales manifolds. The solution helps you leverage both, the popularity of Instagram and the growing trend of product personalization.

Follow these instructions : https://woocommerce.com/products/woocommerce-instagram

Requirements

  • WooCommerce 2.4+
  • Instagram Account
  • Facebook Account
  • Business Account on Instagram

Installation Process for the Plugin

  1. Download the .zip file from the WooCommerce Account
  2. Go To the WordPress Admin > Plugins > Add New and Upload Plugin with the file you downloaded with Choose File
  3. Install the Plugin and Activate the extension

Before starting to configure and use this extension, it’s necessary to have an Instagram Business account connected to a Facebook Page. If the Business Account on your Instagram needs to be activated you can follow the next steps.

  1. Go to Facebook and Create a Page for your Business.
  2. Create a new Instagram account for your business or use your personal account.
  3. Connect the Instagram Account to your Facebook Account

In order to connect the Instagram Account to the Facebook Page, go to your Facebook Page’s Settings and click Instagram, then log into your Instagram account. If the account is not an Instagram Business Account, you will be prompted to set up your Business Profile. Continue through the steps to convert the account to an Instagram Business Account to connect to your Facebook Business Page and leverage the Instagram extension.

Connect Instagram

  • Once the extension is activated and you have an Instagram Business account connected to a Facebook Page, go to WooCommerce > Settings > Integrations > Instagram to proceed to connect your store with Instagram.
  • Click on the Login with Facebook button and log in with the Facebook Account through which the Facebook Page for your business has been created.
  • Accept the requested permissions by the WooCommerce app by clicking on the “Ok” button.
  • Now select the Facebook Page connected to the Instagram Business account from the list displayed by the Facebook page setting and save the settings.

The Instagram Business Account can be counted on for successful connection with your store if you start viewing the Instagram images by using a hashtag on product listings. You will be also notified for the same if a message is prompted for successfully saving the settings.

Renewing access

Usually, after successfully connecting your Instagram account to your store, the plugin requires to renew the access credentials periodically to continue using the Instagram API. Through this alternative plugin for Instagram integration, the process is automatically generated to renew, so the hassles of requesting the access credentials won’t be necessitated unless the intervention of the store owner. But in rare cases, Facebook could invalidate the current credentials (for security reasons, recent changes in its API, strange activity in your account, etc) and you will be required to re-connect your Instagram account with your store manually.

Additionally, in case of large periods of inactivity or problem, with the renewal process, the access credentials could expire. To automate alerts in such cases, the scenarios will be detected well in advance by the WooCommerce Instagram extension through push notifications to the store owner requesting him to re-connect your account manually.

Conclusion

If you’re a product-based e-commerce store, looking to expand your business online through the rapid expansion of your brand awareness to the desired target market, Instagram is one platform to go for. It works brilliantly for brand awareness as well as for sales for almost every type of company. Not only you can just post through the extension but also tag the products on the website for increased sales and traffic.

Note : This post first appeared on our E-Commerce Services website at https://commercecodes.com/instagram-integration-with-woocommerce

Read More
Anand Agarwal May 24, 2020 0 Comments

How to Integrate WooCommerce with Pinterest and Google Shopping

Google Shopping ads are the product thumbnails, which one can easily spot at the top of the search results page. These ads are a visual, dynamic way to attract online shoppers to your store right from Google. And even if when you’re selling through WooCommerce, you can show your products at the most eye-catching place of the Search Results Page. To run these Google Shopping ads, one requires a feed of the products to be shared with Google. This is optimized through extensions, like WooCommerce Google Product Feed, specifically created to achieve uninterrupted access and easy usage for achieving high sales and conversions.

Integrating WooCommerce with Google Shopping

To start with, create an accurate feed of product information for setting up Shopping Ads. These feed gets synced to a Google Merchant Center account. Feeds are supported in two formats: plain text (.txt) and Extensible Markup Language, or XML (.xml). Hence, there are two methods to create your feed file:

  • Manual: With a Google Sheet registered in your Merchant Center account, or a .txt file exported from any spreadsheet editor
  • Automatic: With purpose-built WooCommerce extension that automatically creates and syncs a feed to Google

When it comes to extensions to create a feed, there are a couple of options available on the web. WooCommerce has its own extension, the WooCommerce Google Product Feed coming from the official WooCommerce.com marketplace. This extension proposes a solid choice as it includes email support as well as multiple feeds including Google, Bing, and Google Product reviews. It lets you choose what fields to include and the end result is a fully-automated feed containing all your product information and variations in the correct format for Google. You can also:

  • Add any extra data fields, as you wish, for your particular products and variations.
  • Set up information at a category level to apply to products in a specific category.
  • Set storewide defaults that apply to all products.

Here are the five steps to go from zero to running Google Shopping ads for your WooCommerce products:

  1. Purchase and activate the WooCommerce Google Product Feed
  2. Go to wp/admin → WooCommerce → Settings → Product Feed and select the product data attributes you want for your feed
  3. Sign up for a free Google Merchant Center account. Follow the steps, which include pasting some code to your store’s theme file to verify your URL.
  4. Set up and fetch your feed. Add the unique feed URL from the Product Feed screen in wp-admin to your Google account. It’ll look something like http://www.example.com/?woocommerce_gpf=google.
  5. Link your Google Merchant Center account to your Adwords account, and start advertising.

There are numerous options available online for Google Shopping for WooCommerce Stores. But as the E-Commerce giant presents the alternative on its own association, it has several advantages over other boasted plugins or extensions on the Internet. These are:

  • Choosing from an extensive list of supported fields to add to feed, providing the richest possible data to Google
  • Easy mapping of existing product data onto Google’s required fields from WooCommerce taxonomies, attributes or product fields
  • Capturing data required by Google which is not normally held in WooCommerce, but using the plugin’s additional data entry fields
  • Setting up global store-wide defaults or per-category defaults for fields
  • Providing product-specific information against products or individual variations if required
  • Real-time feed shows the latest information for your products
  • Full support for WooCommerce’s importer and REST API for bulk importing data
  • Integrates with common WooCommerce extensions
  • Extensive documentation covering setup and customization
  • Rich set of WordPress filters and actions allowing flexible customization if necessary

Conclusion

This plugin allows WooCommerce owners to sync and submit the store product data to Google shopping feeds along with several other side benefits. Google Shopping Ads provide advertisers with an avenue that cannot be easily ignored. Hence any WooCommmerce store owner can benefit greatly from Google Shopping Ads as well.

How to integrate Pinterest with WooCommerce Store?

Pinterest has emerged as one of the most effective social media platforms in terms of average order value (beating Facebook). Pinterest can be a great fit for stores that sell physical goods, as it showcases the product images, as well as there are several ways to use Pinterest for WooCommerce Stores. Using the Pinterest for WooCommerce integration to connect store with 250 million monthly active users for ideas, inspiration and branding is remarkable, out-of-the-box strategy for product promotions and sales.

Features of the WooCommerce’s Extension for Pinterest:

  • A secure connection between WooCommerce and Pinterest.
  • List your entire WooCommerce product catalog on Pinterest in minutes.
  • Add new products automatically to your Pinterest boards.
  • Open Graph markup enhances your product images and makes them stand out.
  • Visitors can save your product images to their Pinterest boards.
  • Every Pin contains a direct link to the product on your website.
  • Manage all your Pins in one place and sync images, pricing, and product details in real-time.
  • Use the Pinterest tag to track conversions.

There are two ways to integrate Pinterest with you WooCommerce Store. You can go from WordPress to Pinterest, implementing integrations that help your WordPress content get shared more often and more prominently on Pinterest. The tactics which will be highly accessible with this method of conjunction are:

  • Pin-it buttons
  • Follow buttons
  • Custom share images for Pinterest

Also, apart from the above-mentioned process, you can go the other way and bring Pinterest content onto your WordPress by embedding specific Pinterest boards’ feeds on your WordPress site. This is done through user-friendly plugins in conjunction with complex codes that you can use to implement many of the same things without the need for a plugin.

1.  Adding a Single Pinterest Pin-it Button

Once you install and activate the plugin, go to the new Pinterest PinIt Button option in your WordPress dashboard. At the top, choose whether or not to show the individual Pin-it button on posts or pages.

If you want to show a Pin-it button whenever a user hovers over an image, In the Pinterest PinIt Button settings, scroll down and make sure to turn on the option for Show Pin It Button On Image Hover also configuring the size and color of the button.

Then, save your changes to activate the Pinterest Pin-it button features.

  1. How to Add a Pinterest Follow Me Button to WooCommerce

If you just want to add a simple button that lets your visitors follow you on Pinterest, visit the normal widgets area by going to Appearance → Widgets and configuring the options given in the panel.

  1. 3. How to Embed a Pinterest Board in WordPress

Adding a Pinterest board to a WordPress site is super easy. All one needs to do is embed a Pinterest board directly to your WordPress page without the use of a plugin.

  1. Go to the board on Pinterest which you want to embed.
  2. Click on the dots and go to ‘Make A Widget’.
  3. Copy the code provided to your clipboard.
  4. To add a Widget, go to Appearance -> Widget. Add a text widget to the appropriate widget area and paste the code into the text widget. Save the changes to make it live on your WordPress site.

Conclusion

This plugin allows WooCommerce owners to sync Pinterest features onto their websites, calibrating them with accelerated sales and traction from the Pinterest audience. They can be optimized onto blog sites where owners can leverage them as widgets, utilizing them for increased traffic and providing the clientele with immersive user experience.

This post first appeared on our E-Commerce Services Website at https://commercecodes.com/how-to-integrate-woocommerce-with-pinterest-and-google-shopping

Read More
Anand Agarwal April 21, 2020 0 Comments

How To Integrate Amazon and eBay with WooCommerce

Turn your “just another e-commerce” business into the next big thing. Take hands of WooCommerce, one of the top online selling platforms. With power exuding on every front, WooCommerce offers seamless opportunities to help you scale and sustain your business through countless plugins covering your needs from analytics to listing.

The Amazon and eBay Integration connects your online store with millions of customers on Amazon’s and eBay’s global marketplace network. Amazon and eBay are multi-billion-dollar companies that facilitates C2C and B2C sales.

Now with WooCommerce Amazon and eBay Plugin and integration, you can select multiple products right from your WooCommerce Products page, select a profile to apply a set of predefined options and list them all on eBay and Amazon with just a few clicks.

Download the WooCommerce Plugin from https://woocommerce.com/products/amazon-ebay-integration/

Here is the overview of the WooCommerce Plugin and what features it offers for easy usage and multi-functional options, as well as how to integrate the Plugin to your store.

Features:

  • List your entire WooCommerce product catalogue on Amazon and eBay in minutes
  • Create new Amazon & eBay listings individually, in filtered groups or in bulk
  • Link existing Amazon & eBay listings to their matching products in your WooCommerce catalogue
  • Set separate pricing, fulfilment rules & product details for Amazon and eBay listings based on your existing WooCommerce catalogue data
  • Receive marketplace orders in WooCommerce
  • Sync inventory, orders, pricing and product details in real-time
  • Supports all global Amazon & eBay marketplaces
  • Easy spreadsheet-style management of all your marketplace listings from a single screen within WooCommerce
  • Easy install & go setup, no data migration, no re-platforming

Requirements:

  • eBay account
  • WooCommerce 3.0 or better
  • WordPress 4.2 or better
  • PHP 5.6 or better with cURL support
  • Webspace hosted on a Linux server
  • Not hosted with an incompatible hosting provider
  • Single language site – multilingual sites are not supported and neither is multisite networks!
  • No more than approx. 10,000 products – depending on your server

Connect

Simply install Amazon and eBay Integration, select any of more than 40 global Amazon and eBay marketplaces, and the Setup Wizard will guide you through to connecting your first Amazon or eBay account.

Add the listing

Once you’ve connected your first marketplace and set defaults, you can bulk-list your entire product catalogue on Amazon or eBay in minutes, with the option to have separate pricing, inventory rules, shipping options, or listing details to your WooCommerce store or keep them the same.

Using the powerful search and filter options you can select individual products or groups of products using any WooCommerce field to list, edit, or set rules for separate marketplace listing values.

Sync To Your Website

If you’re already selling on Amazon and eBay, you can connect your existing marketplace listings to their matching products in your WooCommerce catalog making WooCommerce the central hub for managing your online store and marketplaces, not only making multichannel easy but also providing a central reference for inventory and sales data that is crucial for maintaining accurate stock counts and publishing up-to-date pricing across all your connected sales channels.

Whether creating new listings or linking existing ones, inventory, orders, pricing and product details will be synced in real-time. Inventory counts will be updated across all your connected sales channels as soon as a sale occurs, marketplace orders will be immediately sent to WooCommerce, and changes to pricing, product details or inventory rules are instantly reflected on your Amazon and eBay listings.

After the initial sync has completed (takes a few minutes depending on the size of catalogue) you’ll be given a quick tour.  You’re then ready to connect your first marketplace and grant access.

Step 1- Setting Defaults

Next, you’re invited to set “defaults.”  These are used to pre-configure listings as new products are added in WooCommerce making it quicker and easier to list. Note Amazon and eBay have different default options so the defaults you are asked to set depends on which marketplace account you have connected.

  • Price & Quantity – ‘Web Price’ creates a live sync to your WooCommerce prices (a change in price on WooCommerce and marketplace listings get updated automatically) but you can also choose a constant value (no live sync), % or $ increase/decrease (relative to your web price with live sync) and apply to round if desired.

‘Web quantity’ creates a live sync to your WooCommerce inventory (which gets automatically reduced after sales on marketplaces) but you can also choose a fixed value (no live sync), a buffer (e.g. choosing a buffer of 2 when your WooCommerce inventory is 5 will display 3 on listings) and max quantity (e.g. choosing a max quantity of 5 will always show 5 on listings unless WooCommerce inventory drops below 5 where it will show the actual inventory).

  • Shipping & Returns – You can add multiple default shipping services for both domestic & international as well as specify ship to locations. Return periods in days and returns type (exchange/money back) can also be set. For Amazon, you can choose merchant fulfilled or FBA (Fulfilled by Amazon)
  • Categories –For eBay, there is an option to enable ‘auto-categorization’ which compares the product being listed with similar products already on eBay and determines the most appropriate eBay category. Initially, items are listed in ‘Other’ and after a few minutes, the category is updated. If you select ‘Disabled’, you will need to manually set categories for individual or groups of products in the Marketplace Listings grid prior to listing.
  • Product identifiers – Set the field in WooCommerce containing your UPC/EAN/ISBN data so ‘Amazon & eBay Integration’ can match your product with existing listings on the marketplaces.
  • Listing Duration – Set the duration of your eBay listings when items are enabled
  • Auto-list – Choose if new products added to WooCommerce should be automatically listed on eBay with your chosen default settings (make sure you are happy with all your default settings prior to enabling this!)
  • Orders – Choose whether ‘Amazon and eBay Integration’ should automatically send orders to WooCommerce from Amazon/eBay or not. You can decide if auto-send should be for all listings or only the products ‘WooCommerce Amazon & eBay Integration’ is managing (i.e. set to “enabled”). Be sure to consider other apps/channel you have connected and avoided duplicate orders being sent.

Also choose whether to receive orders in WooCommerce when the customer has committed to buy (eBay), when they have an order pending (Amazon) or when they have completed payment.

On eBay, you can choose to have positive feedback sent to eBay customers once they have completed a transaction.

The default setting wizard is launched when you first connect a marketplace account but it can also be accessed to update defaults in Settings.

Understanding the Marketplace Listings Grid

The Marketplace Listings grid is a spreadsheet-style interface that allows fast and easy creation and editing of marketplace listings.

  • Each tab represents a different Amazon and eBay connected marketplace and offers separate configuration for each.
  • Each row represents a single product in your catalogue (any ‘child’ SKUs are found by clicking the ‘+’ symbol on rows). Scroll the grid vertically to see all your products.
  • Each column represents a different field for your products. The fixed left-hand side columns show the details from your product catalogue in WooCommerce and their listing status on the marketplace tab you are on. The right-hand side shows the marketplace settings and values.  Scroll the grid horizontally to view additional settings.
  • Column groups can be expanded and collapsed for easy viewing by clicking the “<>” icon. Additional columns (settings) can be added to (or removed from) the grid using the white “customize grid” button at the top.
  • You can filter, sort and bulk select to quickly make changes by using the check-box at the top-left to select all products (selects all filtered products if you have a filter applied). Or you can select individual product rows with the check-boxes against each product row in the first column.

Step 2 – Listing Products

eBay

  1. Select the products you wish to create eBay listings for by using check-boxes on the left. Remember you can use filters if you wish and select all chosen products with the top check-box. (Note, if you have existing eBay listings you want to link so you can sync them from WooCommerce see ‘Link eBay Listings’ in the ‘Additional Views’ section below).
  2. Check the marketplace settings in the right-hand columns are all set correctly
  3. ‘Enable’ and click the ‘Save and Publish to eBay’

The flashing ‘link’ icon means the listings are being created, and when completed will either turn blue if the listings have been successfully created or red in the case of an error (click on the icon to read the error from eBay).

Amazon

  1. Select the products you wish to list on Amazon using check-boxes on the left (remember you can use filters if you wish and select all chosen products with the top check-box)
  2. Check the marketplace settings in the right-hand columns are all set correctly

Please note that if selling existing products already on Amazon – your product will need to be linked with an existing ASIN (Amazon Standard Identification Number) i.e. an existing Amazon’s listing. When selling your own unique branded product or a product new to the Amazon marketplace – you will need to create a new ASIN i.e. an entirely new listing. ‘Amazon & eBay Integration’ will use product identifiers (UPC/EAN/ISBN) in WooCommerce and attempt to automatically match your products with existing listings on Amazon and find an ASIN for you.

If you have previously created your own listings and they exist in Amazon Seller Central, then ‘Amazon & eBay Integration’ will attempt to match the SKU code from your eCommerce platform with the SKU code that exists in Seller Central and retrieve the existing ASIN.  Please note – SKU code match is only possible for products that are on Seller Central – it is not possible to match SKU codes from your eCommerce platform with products in the general Amazon catalogue (i.e. those not in YOUR Seller Central) because Amazon doesn’t use SKU code product identifiers.

How to Match Your Product with ASIN Number

  • Manually search for the item on Amazon and (if it exists) apply the ASIN and use the existing Amazon product data to list your product
  • Create a new ASIN (add a new, unique product to the Amazon catalogue). To create a new ASIN (listing on Amazon) just select a ‘Category’ and “Enable” and ‘Amazon & eBay Integration’ will create an ASIN and listing for you. (Category column is 5 columns right of “Amazon Status”). 

Note, Multi-variant listings require you also need to select a ‘Variation theme’ e.g. Size/Color.  (Variation theme is found by expanding the ‘Catalog Data’ column group on the far right of the grid).

Once you save using the white Amazon save button (top left), the flashing ‘link’ icon means the listings are being created, and when completed will either turn blue if the listings have been successfully created, or red in the case of an error (click on the icon to read the error from Amazon).

The flashing ‘link’ icon means the listings are being created, and when completed will either turn blue if the listings have been successfully created or red in the case of an error (click on the icon to read the error from Amazon).

Conclusion

It may seem intimidating to bring your Amazon and eBay stores into your WooCommerce store at first thought, but it’s actually not complicated at all and can be done in just a few minutes by installing the plugin.

If you are selling on Amazon and eBay, and those marketplaces aren’t integrated into your ecommerce website, you’re in much of loss. Fortunately, with the official WooCommerce Amazon and eBay Plugin you can connect your existing/new listings on those platforms to the corresponding products in your WooCommerce product listings. Not only does having everything in one convenient location make life a lot easier but also it will help you to run and manage your business more accurately and efficiently.  Having everything on one platform allows you to keep more accurate records, maintain consistent pricing, and see updated inventory information as well as communicate more easily with your customers. Additionally, your records and inventory sync in real-time so if a product sells on one channel, it reflects in WooCommerce and the information goes back out to the other marketplace listings.

This blog first appeared on our E-commerce business site at https://commercecodes.com/how-to-integrate-amazon-and-ebay-with-woocommerce

Read More
Anand Agarwal March 18, 2020 0 Comments

How to Pick WordPress Ecommerce Plugins

How to choose the right eCommerce plugin

1) Determine the kind of products you want to sell

In your WordPress eCommerce page, you can sell both physical products or downloadable goods. So take a choice. Let’s say you want to sell books in your shop, you can sell both hardcover and paperback variants along with an ebook format.

Some eCommerce plugins enable you to sell only physical products, while others like Easy Digital Downloads only promote digital goods selling. If you’re looking to sell both kinds of products in your eshop, you need to look for a WordPress plugin that supports both.

2) Plan how you want to receive payments on your store

Most WordPress store plugins come with already installed default payment gateways. Most of them would have already installed Paypal along with Stripe and Authorize. These are some very common payment gateways and are a must for your shop. You could also do some market studies. It will be difficult to determine where your clients/users will come from.

3) Picking a theme for your site

There are many WordPress themes. But you need to choose a theme backed by your eCommerce plugin. Most WordPress themes are integrated with Woocommerce because it is the most common WordPress shopping cart expansion. There are a lot of themes specifically intended for a certain sector; fashion templates, company templates and even multipurpose ones that fit any kind of website.

4) What kind of add-on apps do you need

Begin by listing what kind of features you’d want your WordPress store to have. Would you like a ‘ save-for-later ‘ feature in the form of a wish list app. Or you want a function that enables you to show product pictures in a slideshow style. Make a list of these applications you want.

Create four categories now. I) Absolute necessity ii) Important to your shop iii) Handy app but not instant necessity iv) Important. Classify the applications you want into these four classifications. This way you’ll understand what applications and characteristics you’d need to invest in right away. You’re not going to overspend on apps that aren’t required right now. And you’ll be able to verify which eCommerce solutions offer you these characteristics.

5) Check out if you’re being given good after-support

This is essential if you are a DIY individual with restricted technical understanding. The solution you choose should not just offer you all the characteristics you need. It should also assist you set up and configure your shop. You should be able to ask your questions and get quick answers with helpful alternatives from them.

Check the reviews online for different eCommerce solutions. A lot of first-time shop owners who began before you may have used some of these alternatives. Peruse through what they’ve got to say about assistance. Many specialists also review these alternatives based on significant parameters such as ease of use, price, support, and evaluation of features.

This blog first appeared on our E-commerce business site at https://commercecodes.com/how-to-pick-wordpress-ecommerce-plugins-your-top-5-choice

Read More
Anand Agarwal February 15, 2020 0 Comments