How to Upsell and Cross Sell On WooCommerce

The best marketing strategy is to sell new products to the customers who have already purchased from you because he is already aware about your brand and has a trust relationship with you.

Acquiring new customers is very costly and time consuming affair so it is better to get the repeat sales from existing customers.

There are two very successful strategy to apply this concept

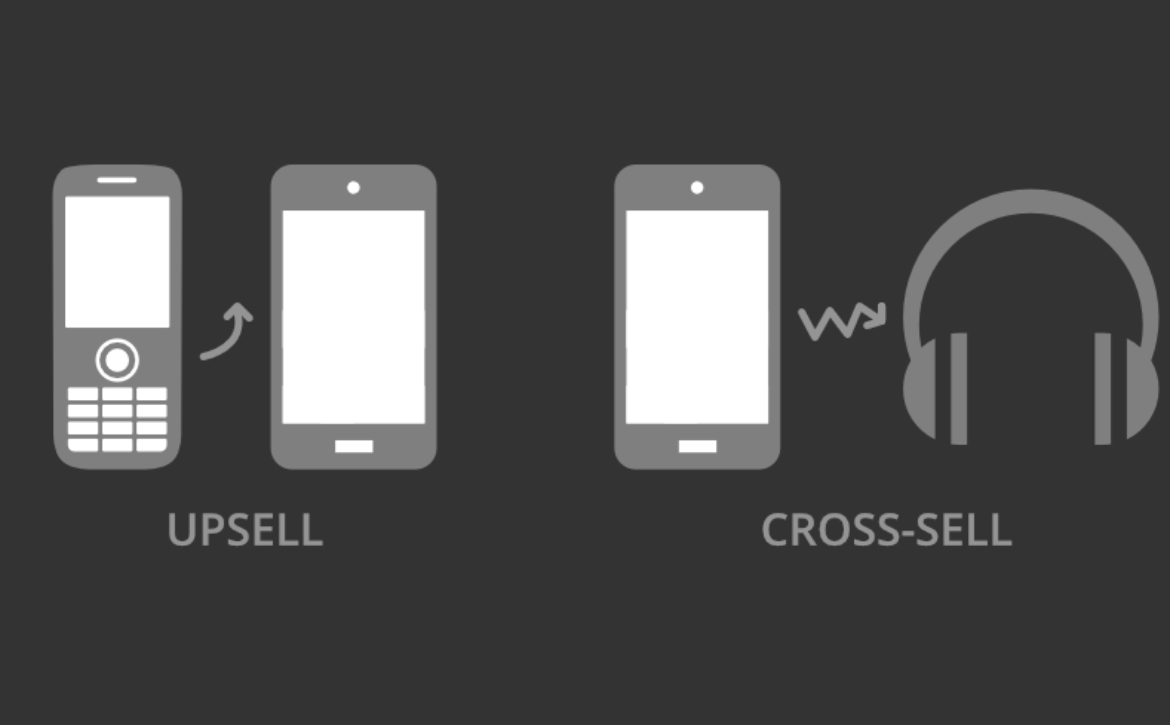
Cross Sell – Selling new products of same category. For example you go to buy a burger and restaurant sells you fries as well.

Upsell – Selling higher version of the same product. For example you go to buy a burger but restaurant offers you upgrades like extra cheese etc.

Up-sells are the products that you recommend based on the currently viewed product. They are typically products that are more profitable or better quality or more expensive.

Cross-sells are products that you promote in the cart, based on the current product. They are typically complementary items.

Picking E-Commerce Plugin

To add an up-sell or cross-sell to a product:

  1. Go to WooCommerce > Products and select the product on which you’d like to show an up-sell or cross-sell.
  2. Scroll down to the Product Data panel.
  3. Select the Linked Products tab in the left menu.
  4. Add the product you wish to link to by searching for it.
  5. Update.

Up-Sells

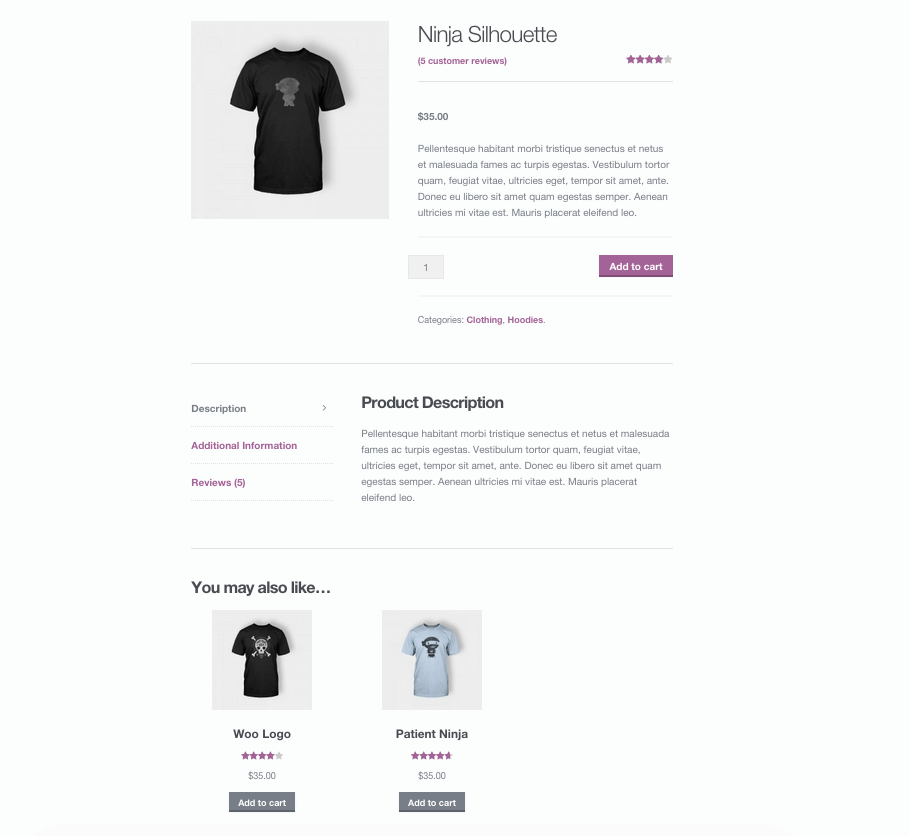
Up-sells are products that you recommend instead of the currently viewed product.

They are typically products that are more profitable or better quality or more expensive. Depending on your theme template, these products display on the single product page underneath the product’s description.

Up-sells (user defined) show on the product page.
Picking E-Commerce Plugin

Cross-Sells

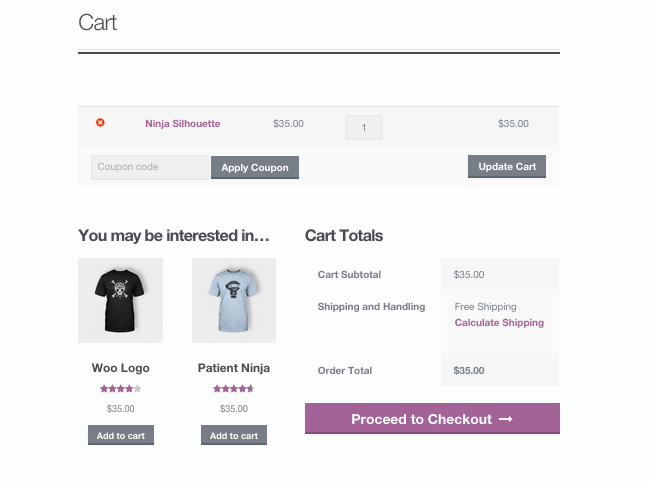
Cross-sells are products that you promote in the cart, based on the current product.

They are typically complementary items. For example, if you are selling a laptop, cross-sells might be a protective case or stickers or a special adapter. Or if you’re selling a ninja t-shirt, they could be a ninja hoodie and ninja socks.

Depending on your theme template, they display on the cart page underneath the cart products table with a thumbnail image.

  • Cross-sells (user defined) show on the cart page.
Picking E-Commerce Plugin

Related Products

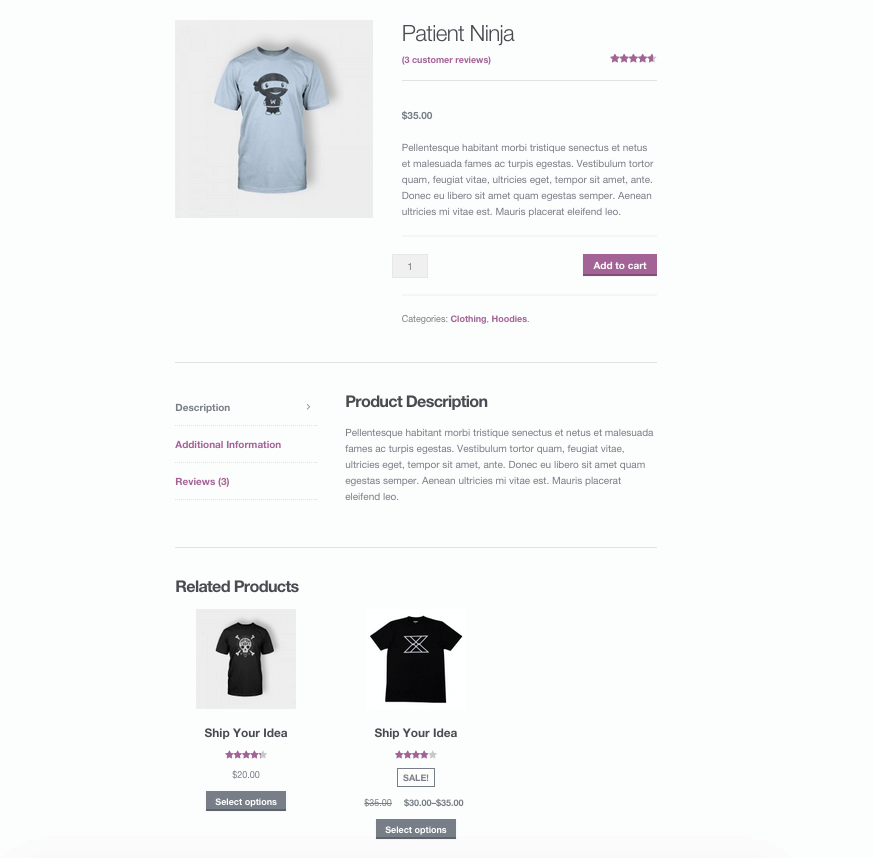
Related Products is a section on some templates that pulls products from your store that share the same tags or categories as the current product.

These products cannot be specified in the admin, but can be influenced by grouping similar products in the same category or by using the same tags.

  • Related products (automatic) also show on the product page.
Picking E-Commerce Plugin

By using plugin – Boost Sales (https://wordpress.org/plugins/woo-boost-sales/)

Boost Sales for WooCommerce is a WooCommerce extension that helps you increase the revenue of every single order by suggesting Up-selling and Cross-selling products to customers. Through these sales strategies, you’re presenting the customer with something that will improve their purchase and, consequently their lives. The ease of shopping the methods provides to them by the valuable add-ons or upgrade recommendations waiting for them, helps in building trust with the customer base.

Up-Sell Features WooCommerce offers in Basic Version

  • The up-sell feature helps you to offer related product when customers add a product to the cart by displaying an up-sell pop-up.
  • Whenever a product is added to cart, the plugin will display an up-sell. The pop-up display related product which you recommend customer to buy with the product which just added to cart.
  • The owner can select the up-sell products of each product in the plugin’s backend.
  • In cases where there are numerous products, the owner can use the up-sell products in the same categories option. The plugin will display product same categories with the product just has been added to cart in up-sell pop-up.

Cross-Sell Features WooCommerce offers in Basic Version

  • The cross-sell feature helps you to offer customers to buy a bundle product with a better price instead of buying single products.
  • One can create cross-sell bundles by selecting products and set a sale price.
  • The cross-sell pop-up appears on the corner single product page. Offer customers the bundle with information about products, original price, sale price and how much customers can save.

Premium Up-Sell Feature of WooCommerce Boos Sales Plugin

  • Allows you to add up-sell for multiple products at once.
  • The plugin will list up-sell products which you listed in WooCommerce to display.
  • This option allows you to hide the up-sell pop-up on single product pages. The pop-up will appear only on shop/category pages.
  • Hides out of stock products on up-sell pop up automatically.
  • The products added in the cart will not be displayed on the up-sell pop-up.
  • Automatically redirects the customer to cart page when an up-sell product is added to cart.
  • The plugin will automatically display recent viewed product on up-sell product.
  • With the displays product in the lowest subcategory level on up-sell pop-up. It shows when “Up-sell product in same categories” is enabled.
  • The plugin will not display up-sell pop-up on selected products.
  • Allows the owner to select the order of up-sell products on up-sell pop-up, by price, name and other categories.
  • One can select to display the view more button on up-sell product. The button allows the customer to go up-sell product page.
  • The plugin works with AJAX to add to cart button of WooCommerce, which increases loading time speed.
  • AJAX adds up-sell products to cart, the pages will not be reloaded.

Premium Cross-Sell Feature of WooCommerce Boos Sales Plugin

  • The cross-sell bundle will be displayed in products instead of a pop-up. You can choose to display under add to cart button, above description tab, under the description tab.
  • Choose if you want to display the cross-sell on the single product page.
  • Choose if you want to display the cross-sell on the cart page.
  • Choose if you want to display the cross-sell on the checkout page.
  • Change the description of the cross-sell bundle.
  • Change the cross-sell bundle name.
  • When the cross-sell bundle is added to cart, the cross-sell product will be removed.
  • Add the bundle to cart without reloading the page.
  • If a product in the bundle is out-of-stock, the bundle will not be displayed.
  • Set price rules, then the plugin will automatically calculate the bundle price.

Discount Features for Effective Upsell and Cross-Sell

  • The discount bar helps you to make the customer pay more by offering them a discount. By selecting a coupon with a minimum spend requires. The plugin will display on front-end how much customers have added to cart. And how much they need to spend more to receive a discount.
  • Select a coupon code which you want to use as the prize of the discount bar.
  • Inform customers as they receive a discount if they spend and reach the minimum amount.

Note : This post first appeared on our E-Commerce Services Business Website at https://commercecodes.com/how-to-upsell-and-cross-sell-on-woocommerce

Read More
Anand Agarwal June 15, 2020 0 Comments

Instagram Integration with WooCommerce

Instagram enjoys more than 75 million daily active users; this mass usage has resulted in extensive inclusion of the photo-sharing website in various business. Millions of business owners are currently leveraging the social media platform to their benefit, thereby increasing brand awareness and sales many folds with each year. And alike other E-Commerce platform users, WooCommerce also provides a one-stop, out of the box, alternate solution for the complex integration of Instagram to the WooCommerce store.

Manual integration for Instagram

Please follow the instructions on https://docs.woocommerce.com/document/shopping-instagram-woocommerce/

Requirements:

  • WooCommerce store with physical products
  • Instagram app for iOS or for Android – most current version
  • Instagram account with an approved business profile
  • Facebook Page catalog to link to Instagram business profile

Setup and Configuration

This guide walks you through setup of Shopping on Instagram with WooCommerce in steps.

Prepare your WooCommerce Store and Products

  1. Use the Setup Wizard (https://docs.woocommerce.com/document/woocommerce-setup-wizard/) to start a new store. Or ensure your current store is updated and ready for visibility on Facebook and Instagram.
  2. Add new products or manage existing ones. More at: Adding and Managing Products.
  3. Ensure that physical products to be promoted are in compliance with the Facebook Commerce Policy.

Create a Facebook Page and Catalog

  1. Go to Facebook and Create a Page for your Business.
  2. Go to Catalog Manager and Create a Catalog.
  3. Add products to your Catalog.
  4. Create a Product Set if there is a group of items you wish to promote together (optional; only if relevant).

Get an Approved Business Profile

  1. Be located in a country where Shopping for Instagram is available. Countries approved for Shopping for Instagram.
  2. Create a new Instagram account for your business. Or convert your personal account to a business account.
  3. Connect your Facebook Page Catalog to your Instagram Business profile in the app. More at: Connect a Facebook catalog with an Instagram Business profile.
  4. Wait for approval from Instagram. This process takes a few hours or days.

Once approved, a push notification appears.

Picking E-Commerce Plugin

Congratulations! It’s time to start tagging.

Picking E-Commerce Plugin

To start tagging products from your WooCommerce store in Instagram images:

Enable Product Tagging

  1. Use the Instagram app and go to your Profile.
  2. Select the Get Started alert or the gear icon.
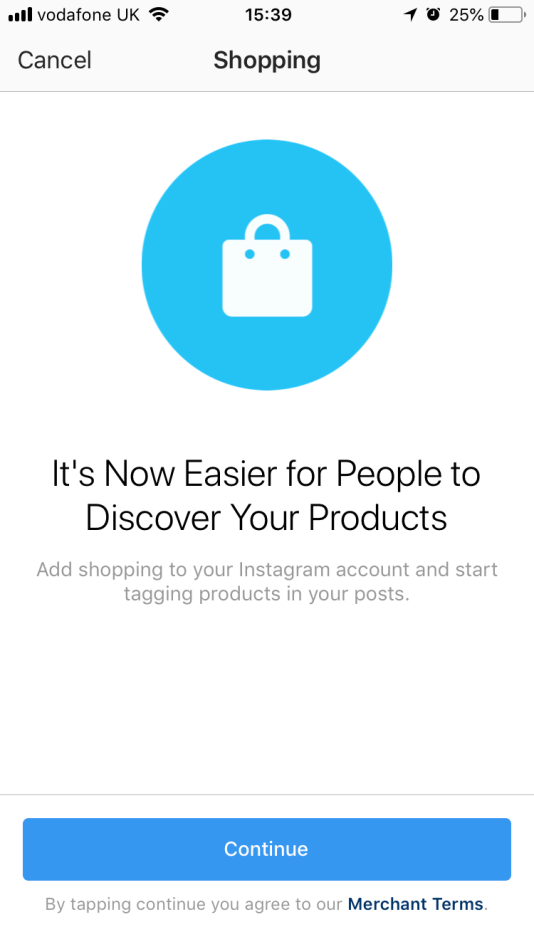
  3. Go to: Shopping > Continue.
  4. Select a catalog to connect to your Business profile.
  5. Done.

Tag Products on your Instagram Posts

  1. Using the Instagram app, select a photo and add a caption, any filter or hashtag, as usual.
  2. Tap products you wish to tag.
  3. Enter names of products to tag, and select them as they appear in the Search box.
  4. Done.
  5. Share.

You can tag up to five (5) products in a single Instagram post or 20 products in a multi-image post.

More at: Tagging Products on Instagram Posts.

Picking E-Commerce Plugin

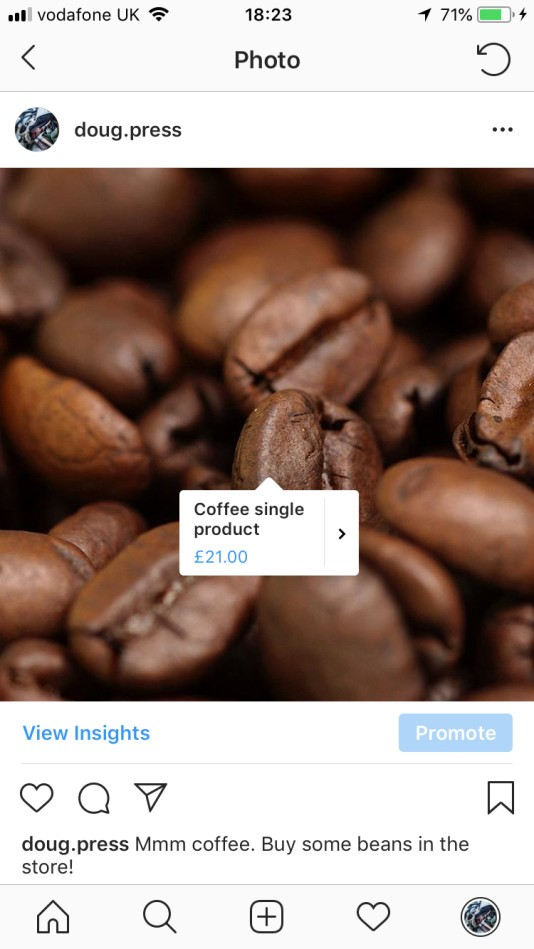
Tapping a tag on your Instagram post, a customer sees:

  • Image of the product via Facebook
  • Description of the product
  • Cost of the product
  • > Link that takes them to where they can purchase the product.

WooCommerce Plugin for Instagram integration

One such extension you can use for the integration of the most coveted social media platform is Instagram with WooCommerce. This Instagram WooCommerce Integration allows users to view the brands’ products through updates, pave way for easier linkage to website for better discovery and shopping experience for the target consumers, thereby increasing sales manifolds. The solution helps you leverage both, the popularity of Instagram and the growing trend of product personalization.

Follow these instructions : https://woocommerce.com/products/woocommerce-instagram

Requirements

  • WooCommerce 2.4+
  • Instagram Account
  • Facebook Account
  • Business Account on Instagram

Installation Process for the Plugin

  1. Download the .zip file from the WooCommerce Account
  2. Go To the WordPress Admin > Plugins > Add New and Upload Plugin with the file you downloaded with Choose File
  3. Install the Plugin and Activate the extension

Before starting to configure and use this extension, it’s necessary to have an Instagram Business account connected to a Facebook Page. If the Business Account on your Instagram needs to be activated you can follow the next steps.

  1. Go to Facebook and Create a Page for your Business.
  2. Create a new Instagram account for your business or use your personal account.
  3. Connect the Instagram Account to your Facebook Account

In order to connect the Instagram Account to the Facebook Page, go to your Facebook Page’s Settings and click Instagram, then log into your Instagram account. If the account is not an Instagram Business Account, you will be prompted to set up your Business Profile. Continue through the steps to convert the account to an Instagram Business Account to connect to your Facebook Business Page and leverage the Instagram extension.

Connect Instagram

  • Once the extension is activated and you have an Instagram Business account connected to a Facebook Page, go to WooCommerce > Settings > Integrations > Instagram to proceed to connect your store with Instagram.
  • Click on the Login with Facebook button and log in with the Facebook Account through which the Facebook Page for your business has been created.
  • Accept the requested permissions by the WooCommerce app by clicking on the “Ok” button.
  • Now select the Facebook Page connected to the Instagram Business account from the list displayed by the Facebook page setting and save the settings.

The Instagram Business Account can be counted on for successful connection with your store if you start viewing the Instagram images by using a hashtag on product listings. You will be also notified for the same if a message is prompted for successfully saving the settings.

Renewing access

Usually, after successfully connecting your Instagram account to your store, the plugin requires to renew the access credentials periodically to continue using the Instagram API. Through this alternative plugin for Instagram integration, the process is automatically generated to renew, so the hassles of requesting the access credentials won’t be necessitated unless the intervention of the store owner. But in rare cases, Facebook could invalidate the current credentials (for security reasons, recent changes in its API, strange activity in your account, etc) and you will be required to re-connect your Instagram account with your store manually.

Additionally, in case of large periods of inactivity or problem, with the renewal process, the access credentials could expire. To automate alerts in such cases, the scenarios will be detected well in advance by the WooCommerce Instagram extension through push notifications to the store owner requesting him to re-connect your account manually.

Conclusion

If you’re a product-based e-commerce store, looking to expand your business online through the rapid expansion of your brand awareness to the desired target market, Instagram is one platform to go for. It works brilliantly for brand awareness as well as for sales for almost every type of company. Not only you can just post through the extension but also tag the products on the website for increased sales and traffic.

Note : This post first appeared on our E-Commerce Services website at https://commercecodes.com/instagram-integration-with-woocommerce

Read More
Anand Agarwal May 24, 2020 0 Comments

How to Integrate WooCommerce with Pinterest and Google Shopping

Google Shopping ads are the product thumbnails, which one can easily spot at the top of the search results page. These ads are a visual, dynamic way to attract online shoppers to your store right from Google. And even if when you’re selling through WooCommerce, you can show your products at the most eye-catching place of the Search Results Page. To run these Google Shopping ads, one requires a feed of the products to be shared with Google. This is optimized through extensions, like WooCommerce Google Product Feed, specifically created to achieve uninterrupted access and easy usage for achieving high sales and conversions.

Integrating WooCommerce with Google Shopping

To start with, create an accurate feed of product information for setting up Shopping Ads. These feed gets synced to a Google Merchant Center account. Feeds are supported in two formats: plain text (.txt) and Extensible Markup Language, or XML (.xml). Hence, there are two methods to create your feed file:

  • Manual: With a Google Sheet registered in your Merchant Center account, or a .txt file exported from any spreadsheet editor
  • Automatic: With purpose-built WooCommerce extension that automatically creates and syncs a feed to Google

When it comes to extensions to create a feed, there are a couple of options available on the web. WooCommerce has its own extension, the WooCommerce Google Product Feed coming from the official WooCommerce.com marketplace. This extension proposes a solid choice as it includes email support as well as multiple feeds including Google, Bing, and Google Product reviews. It lets you choose what fields to include and the end result is a fully-automated feed containing all your product information and variations in the correct format for Google. You can also:

  • Add any extra data fields, as you wish, for your particular products and variations.
  • Set up information at a category level to apply to products in a specific category.
  • Set storewide defaults that apply to all products.

Here are the five steps to go from zero to running Google Shopping ads for your WooCommerce products:

  1. Purchase and activate the WooCommerce Google Product Feed
  2. Go to wp/admin → WooCommerce → Settings → Product Feed and select the product data attributes you want for your feed
  3. Sign up for a free Google Merchant Center account. Follow the steps, which include pasting some code to your store’s theme file to verify your URL.
  4. Set up and fetch your feed. Add the unique feed URL from the Product Feed screen in wp-admin to your Google account. It’ll look something like http://www.example.com/?woocommerce_gpf=google.
  5. Link your Google Merchant Center account to your Adwords account, and start advertising.

There are numerous options available online for Google Shopping for WooCommerce Stores. But as the E-Commerce giant presents the alternative on its own association, it has several advantages over other boasted plugins or extensions on the Internet. These are:

  • Choosing from an extensive list of supported fields to add to feed, providing the richest possible data to Google
  • Easy mapping of existing product data onto Google’s required fields from WooCommerce taxonomies, attributes or product fields
  • Capturing data required by Google which is not normally held in WooCommerce, but using the plugin’s additional data entry fields
  • Setting up global store-wide defaults or per-category defaults for fields
  • Providing product-specific information against products or individual variations if required
  • Real-time feed shows the latest information for your products
  • Full support for WooCommerce’s importer and REST API for bulk importing data
  • Integrates with common WooCommerce extensions
  • Extensive documentation covering setup and customization
  • Rich set of WordPress filters and actions allowing flexible customization if necessary

Conclusion

This plugin allows WooCommerce owners to sync and submit the store product data to Google shopping feeds along with several other side benefits. Google Shopping Ads provide advertisers with an avenue that cannot be easily ignored. Hence any WooCommmerce store owner can benefit greatly from Google Shopping Ads as well.

How to integrate Pinterest with WooCommerce Store?

Pinterest has emerged as one of the most effective social media platforms in terms of average order value (beating Facebook). Pinterest can be a great fit for stores that sell physical goods, as it showcases the product images, as well as there are several ways to use Pinterest for WooCommerce Stores. Using the Pinterest for WooCommerce integration to connect store with 250 million monthly active users for ideas, inspiration and branding is remarkable, out-of-the-box strategy for product promotions and sales.

Features of the WooCommerce’s Extension for Pinterest:

  • A secure connection between WooCommerce and Pinterest.
  • List your entire WooCommerce product catalog on Pinterest in minutes.
  • Add new products automatically to your Pinterest boards.
  • Open Graph markup enhances your product images and makes them stand out.
  • Visitors can save your product images to their Pinterest boards.
  • Every Pin contains a direct link to the product on your website.
  • Manage all your Pins in one place and sync images, pricing, and product details in real-time.
  • Use the Pinterest tag to track conversions.

There are two ways to integrate Pinterest with you WooCommerce Store. You can go from WordPress to Pinterest, implementing integrations that help your WordPress content get shared more often and more prominently on Pinterest. The tactics which will be highly accessible with this method of conjunction are:

  • Pin-it buttons
  • Follow buttons
  • Custom share images for Pinterest

Also, apart from the above-mentioned process, you can go the other way and bring Pinterest content onto your WordPress by embedding specific Pinterest boards’ feeds on your WordPress site. This is done through user-friendly plugins in conjunction with complex codes that you can use to implement many of the same things without the need for a plugin.

1.  Adding a Single Pinterest Pin-it Button

Once you install and activate the plugin, go to the new Pinterest PinIt Button option in your WordPress dashboard. At the top, choose whether or not to show the individual Pin-it button on posts or pages.

If you want to show a Pin-it button whenever a user hovers over an image, In the Pinterest PinIt Button settings, scroll down and make sure to turn on the option for Show Pin It Button On Image Hover also configuring the size and color of the button.

Then, save your changes to activate the Pinterest Pin-it button features.

  1. How to Add a Pinterest Follow Me Button to WooCommerce

If you just want to add a simple button that lets your visitors follow you on Pinterest, visit the normal widgets area by going to Appearance → Widgets and configuring the options given in the panel.

  1. 3. How to Embed a Pinterest Board in WordPress

Adding a Pinterest board to a WordPress site is super easy. All one needs to do is embed a Pinterest board directly to your WordPress page without the use of a plugin.

  1. Go to the board on Pinterest which you want to embed.
  2. Click on the dots and go to ‘Make A Widget’.
  3. Copy the code provided to your clipboard.
  4. To add a Widget, go to Appearance -> Widget. Add a text widget to the appropriate widget area and paste the code into the text widget. Save the changes to make it live on your WordPress site.

Conclusion

This plugin allows WooCommerce owners to sync Pinterest features onto their websites, calibrating them with accelerated sales and traction from the Pinterest audience. They can be optimized onto blog sites where owners can leverage them as widgets, utilizing them for increased traffic and providing the clientele with immersive user experience.

This post first appeared on our E-Commerce Services Website at https://commercecodes.com/how-to-integrate-woocommerce-with-pinterest-and-google-shopping

Read More
Anand Agarwal April 21, 2020 0 Comments

How To Integrate Amazon and eBay with WooCommerce

Turn your “just another e-commerce” business into the next big thing. Take hands of WooCommerce, one of the top online selling platforms. With power exuding on every front, WooCommerce offers seamless opportunities to help you scale and sustain your business through countless plugins covering your needs from analytics to listing.

The Amazon and eBay Integration connects your online store with millions of customers on Amazon’s and eBay’s global marketplace network. Amazon and eBay are multi-billion-dollar companies that facilitates C2C and B2C sales.

Now with WooCommerce Amazon and eBay Plugin and integration, you can select multiple products right from your WooCommerce Products page, select a profile to apply a set of predefined options and list them all on eBay and Amazon with just a few clicks.

Download the WooCommerce Plugin from https://woocommerce.com/products/amazon-ebay-integration/

Here is the overview of the WooCommerce Plugin and what features it offers for easy usage and multi-functional options, as well as how to integrate the Plugin to your store.

Features:

  • List your entire WooCommerce product catalogue on Amazon and eBay in minutes
  • Create new Amazon & eBay listings individually, in filtered groups or in bulk
  • Link existing Amazon & eBay listings to their matching products in your WooCommerce catalogue
  • Set separate pricing, fulfilment rules & product details for Amazon and eBay listings based on your existing WooCommerce catalogue data
  • Receive marketplace orders in WooCommerce
  • Sync inventory, orders, pricing and product details in real-time
  • Supports all global Amazon & eBay marketplaces
  • Easy spreadsheet-style management of all your marketplace listings from a single screen within WooCommerce
  • Easy install & go setup, no data migration, no re-platforming

Requirements:

  • eBay account
  • WooCommerce 3.0 or better
  • WordPress 4.2 or better
  • PHP 5.6 or better with cURL support
  • Webspace hosted on a Linux server
  • Not hosted with an incompatible hosting provider
  • Single language site – multilingual sites are not supported and neither is multisite networks!
  • No more than approx. 10,000 products – depending on your server

Connect

Simply install Amazon and eBay Integration, select any of more than 40 global Amazon and eBay marketplaces, and the Setup Wizard will guide you through to connecting your first Amazon or eBay account.

Add the listing

Once you’ve connected your first marketplace and set defaults, you can bulk-list your entire product catalogue on Amazon or eBay in minutes, with the option to have separate pricing, inventory rules, shipping options, or listing details to your WooCommerce store or keep them the same.

Using the powerful search and filter options you can select individual products or groups of products using any WooCommerce field to list, edit, or set rules for separate marketplace listing values.

Sync To Your Website

If you’re already selling on Amazon and eBay, you can connect your existing marketplace listings to their matching products in your WooCommerce catalog making WooCommerce the central hub for managing your online store and marketplaces, not only making multichannel easy but also providing a central reference for inventory and sales data that is crucial for maintaining accurate stock counts and publishing up-to-date pricing across all your connected sales channels.

Whether creating new listings or linking existing ones, inventory, orders, pricing and product details will be synced in real-time. Inventory counts will be updated across all your connected sales channels as soon as a sale occurs, marketplace orders will be immediately sent to WooCommerce, and changes to pricing, product details or inventory rules are instantly reflected on your Amazon and eBay listings.

After the initial sync has completed (takes a few minutes depending on the size of catalogue) you’ll be given a quick tour.  You’re then ready to connect your first marketplace and grant access.

Step 1- Setting Defaults

Next, you’re invited to set “defaults.”  These are used to pre-configure listings as new products are added in WooCommerce making it quicker and easier to list. Note Amazon and eBay have different default options so the defaults you are asked to set depends on which marketplace account you have connected.

  • Price & Quantity – ‘Web Price’ creates a live sync to your WooCommerce prices (a change in price on WooCommerce and marketplace listings get updated automatically) but you can also choose a constant value (no live sync), % or $ increase/decrease (relative to your web price with live sync) and apply to round if desired.

‘Web quantity’ creates a live sync to your WooCommerce inventory (which gets automatically reduced after sales on marketplaces) but you can also choose a fixed value (no live sync), a buffer (e.g. choosing a buffer of 2 when your WooCommerce inventory is 5 will display 3 on listings) and max quantity (e.g. choosing a max quantity of 5 will always show 5 on listings unless WooCommerce inventory drops below 5 where it will show the actual inventory).

  • Shipping & Returns – You can add multiple default shipping services for both domestic & international as well as specify ship to locations. Return periods in days and returns type (exchange/money back) can also be set. For Amazon, you can choose merchant fulfilled or FBA (Fulfilled by Amazon)
  • Categories –For eBay, there is an option to enable ‘auto-categorization’ which compares the product being listed with similar products already on eBay and determines the most appropriate eBay category. Initially, items are listed in ‘Other’ and after a few minutes, the category is updated. If you select ‘Disabled’, you will need to manually set categories for individual or groups of products in the Marketplace Listings grid prior to listing.
  • Product identifiers – Set the field in WooCommerce containing your UPC/EAN/ISBN data so ‘Amazon & eBay Integration’ can match your product with existing listings on the marketplaces.
  • Listing Duration – Set the duration of your eBay listings when items are enabled
  • Auto-list – Choose if new products added to WooCommerce should be automatically listed on eBay with your chosen default settings (make sure you are happy with all your default settings prior to enabling this!)
  • Orders – Choose whether ‘Amazon and eBay Integration’ should automatically send orders to WooCommerce from Amazon/eBay or not. You can decide if auto-send should be for all listings or only the products ‘WooCommerce Amazon & eBay Integration’ is managing (i.e. set to “enabled”). Be sure to consider other apps/channel you have connected and avoided duplicate orders being sent.

Also choose whether to receive orders in WooCommerce when the customer has committed to buy (eBay), when they have an order pending (Amazon) or when they have completed payment.

On eBay, you can choose to have positive feedback sent to eBay customers once they have completed a transaction.

The default setting wizard is launched when you first connect a marketplace account but it can also be accessed to update defaults in Settings.

Understanding the Marketplace Listings Grid

The Marketplace Listings grid is a spreadsheet-style interface that allows fast and easy creation and editing of marketplace listings.

  • Each tab represents a different Amazon and eBay connected marketplace and offers separate configuration for each.
  • Each row represents a single product in your catalogue (any ‘child’ SKUs are found by clicking the ‘+’ symbol on rows). Scroll the grid vertically to see all your products.
  • Each column represents a different field for your products. The fixed left-hand side columns show the details from your product catalogue in WooCommerce and their listing status on the marketplace tab you are on. The right-hand side shows the marketplace settings and values.  Scroll the grid horizontally to view additional settings.
  • Column groups can be expanded and collapsed for easy viewing by clicking the “<>” icon. Additional columns (settings) can be added to (or removed from) the grid using the white “customize grid” button at the top.
  • You can filter, sort and bulk select to quickly make changes by using the check-box at the top-left to select all products (selects all filtered products if you have a filter applied). Or you can select individual product rows with the check-boxes against each product row in the first column.

Step 2 – Listing Products

eBay

  1. Select the products you wish to create eBay listings for by using check-boxes on the left. Remember you can use filters if you wish and select all chosen products with the top check-box. (Note, if you have existing eBay listings you want to link so you can sync them from WooCommerce see ‘Link eBay Listings’ in the ‘Additional Views’ section below).
  2. Check the marketplace settings in the right-hand columns are all set correctly
  3. ‘Enable’ and click the ‘Save and Publish to eBay’

The flashing ‘link’ icon means the listings are being created, and when completed will either turn blue if the listings have been successfully created or red in the case of an error (click on the icon to read the error from eBay).

Amazon

  1. Select the products you wish to list on Amazon using check-boxes on the left (remember you can use filters if you wish and select all chosen products with the top check-box)
  2. Check the marketplace settings in the right-hand columns are all set correctly

Please note that if selling existing products already on Amazon – your product will need to be linked with an existing ASIN (Amazon Standard Identification Number) i.e. an existing Amazon’s listing. When selling your own unique branded product or a product new to the Amazon marketplace – you will need to create a new ASIN i.e. an entirely new listing. ‘Amazon & eBay Integration’ will use product identifiers (UPC/EAN/ISBN) in WooCommerce and attempt to automatically match your products with existing listings on Amazon and find an ASIN for you.

If you have previously created your own listings and they exist in Amazon Seller Central, then ‘Amazon & eBay Integration’ will attempt to match the SKU code from your eCommerce platform with the SKU code that exists in Seller Central and retrieve the existing ASIN.  Please note – SKU code match is only possible for products that are on Seller Central – it is not possible to match SKU codes from your eCommerce platform with products in the general Amazon catalogue (i.e. those not in YOUR Seller Central) because Amazon doesn’t use SKU code product identifiers.

How to Match Your Product with ASIN Number

  • Manually search for the item on Amazon and (if it exists) apply the ASIN and use the existing Amazon product data to list your product
  • Create a new ASIN (add a new, unique product to the Amazon catalogue). To create a new ASIN (listing on Amazon) just select a ‘Category’ and “Enable” and ‘Amazon & eBay Integration’ will create an ASIN and listing for you. (Category column is 5 columns right of “Amazon Status”). 

Note, Multi-variant listings require you also need to select a ‘Variation theme’ e.g. Size/Color.  (Variation theme is found by expanding the ‘Catalog Data’ column group on the far right of the grid).

Once you save using the white Amazon save button (top left), the flashing ‘link’ icon means the listings are being created, and when completed will either turn blue if the listings have been successfully created, or red in the case of an error (click on the icon to read the error from Amazon).

The flashing ‘link’ icon means the listings are being created, and when completed will either turn blue if the listings have been successfully created or red in the case of an error (click on the icon to read the error from Amazon).

Conclusion

It may seem intimidating to bring your Amazon and eBay stores into your WooCommerce store at first thought, but it’s actually not complicated at all and can be done in just a few minutes by installing the plugin.

If you are selling on Amazon and eBay, and those marketplaces aren’t integrated into your ecommerce website, you’re in much of loss. Fortunately, with the official WooCommerce Amazon and eBay Plugin you can connect your existing/new listings on those platforms to the corresponding products in your WooCommerce product listings. Not only does having everything in one convenient location make life a lot easier but also it will help you to run and manage your business more accurately and efficiently.  Having everything on one platform allows you to keep more accurate records, maintain consistent pricing, and see updated inventory information as well as communicate more easily with your customers. Additionally, your records and inventory sync in real-time so if a product sells on one channel, it reflects in WooCommerce and the information goes back out to the other marketplace listings.

This blog first appeared on our E-commerce business site at https://commercecodes.com/how-to-integrate-amazon-and-ebay-with-woocommerce

Read More
Anand Agarwal March 18, 2020 0 Comments