


45 Important things to do immediately after installing the WordPress site
1- Set Up Site Title, Tagline, and Timezone
First change the site title, tagline, and timezone settings. Simply head over to Settings » General page and change these settings.
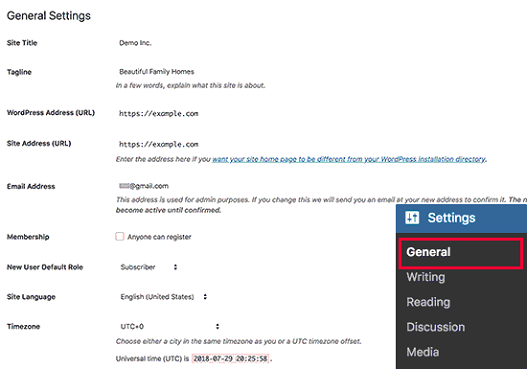
The Title and the tagline are one of the essential elements that identify your website, and tell people and search engines what your website is about.
The Title works as the name of your website. It’ll appear in the title bar of the browser and is usually (depends on the theme) displayed in your site’s header.
The Tagline is a short description that explains what your site is about. Think of it as a slogan that completes the Site Title. It appears next to the Title in the browser’s title bar.
Replace the default tagline “Just another WordPress site” with your tagline.
2 – Enable User Registration
You need to decide if you are going to have a multi-author blog.
To allow this, tick off the “Anyone can register” box, and set the “New User Default Role” as “Contributor”.
If you don’t want people to register, don’t tick the “Anyone can register” box.
3 – Set WordPress Discussion/Comments Settings
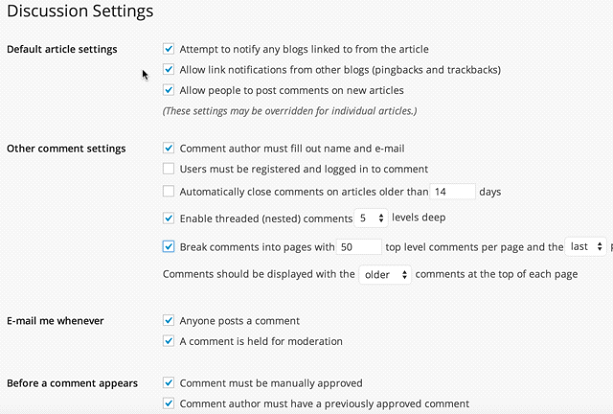
Go to Settings » Discussion.
Most of the settings are self-explanatory here.
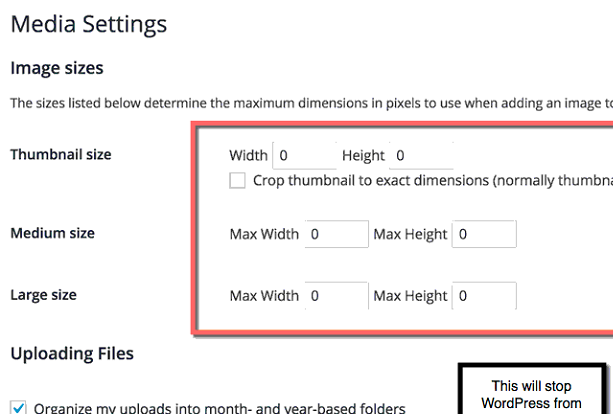
4 – WordPress Media Settings
This setting will greatly improve the way WordPress handles images.
By default, WordPress create multiple sizes for every uploaded image. This is not a good practice. This will load up your blog with unnecessary files and your blog will quickly become bloated.
Go to Settings » Media, and use the below screenshot to configure the proper settings:
Also, add a plugin which compresses images as they’re uploaded.
5 – Set the WordPress Address URL and Site Address URL
The WordPress address can be with or without the “www” bit. It’s crucial that what you choose here is the same as your preferred setting in Google Search Console.
For example, if you choose “yourdomain.com” without the “www” bit, and someone tries to navigate to “www.yourdomain.com”, it will redirect to “yourdomain.com”.
In Google Search Console, you need to make sure that you configure the preferred domain to be the same as what you configure in your WordPress admin dashboard, in this case “yourdomain.com”. Google will then display that preferred domain in the search results.
The site address URL should be different if you want your WordPress installation to be different from your website’s actual home page.
6 – Configure the Front Page Settings
The home page of your new WordPress site can be either a custom made page, or it can simply be a summary of the latest blog posts.
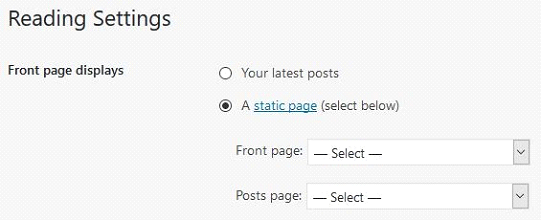
When you’ve just installed WordPress, you won’t have any content so this setting isn’t all that important yet. But it’s good to know that this setting exists.
Once you have your home page designed and created then you can revisit this setting and select the Front page from here.
7 – Change the Blog Permalink Structure
The permalink settings determine what the URL structure will look like for your permalinks and archives.
For example, you can choose to have the day, month and year included in the blog post URL. Or you can have a numeric value instead of the blog title in the URL.
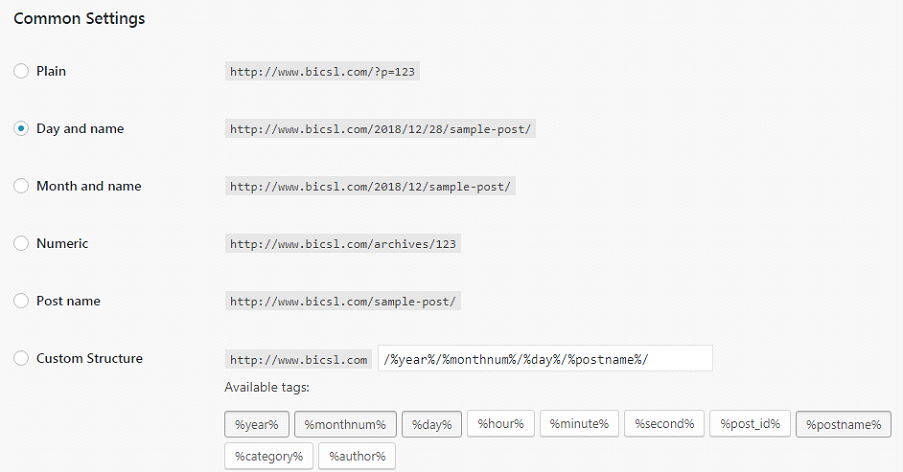
The best option? Just the post name. No dates or numeric values. Unless you find the date to be useful for your readers, there is no benefit to have this included in the URL.
Numeric values are even worse, because they don’t mean anything. In addition, the search engines will frown upon it too.
In general, search engines like short and descriptive URLs.
8 – Set Your Timezone, Date and Time Format
In Settings » General you’ll find the options for Timezone, Date and Time Format.
Choose a city in the same timezone as you are or a UTC option if you don’t find your city. Now your posts’ time will be synchronized with your actual timezone and your posts scheduling will work as you expect.
Date and Time format settings control the way they’re displayed in your site. They usually appear as the metadata of your posts and tell the visitors when were the posts published or updated. You can choose one of the preformatted options or generate a format of your own.
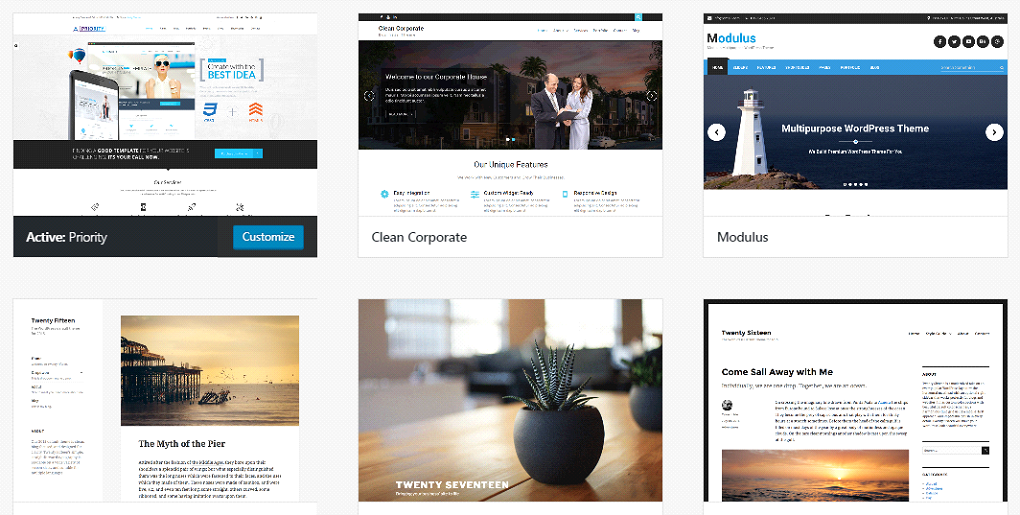
9 – Install a WordPress Theme and Uninstall Unused Themes
By default, a WordPress installation comes with several free themes. One of these free themes will be the one that is activated.
Choosing a theme is an important step because a theme has a huge impact on the success of your WordPress site and blog. A theme should match your expectations in regards to look and feel. A theme should be a good reflection of your brand. In addition, a theme should be well-programmed and regularly updated.
You can either keep using a free theme, or you can decide to purchase a premium theme. It’s important to delete any themes that you’re not using, as they can make your website a lot heavier. Just like with plugins, only use what you really need. In other words, you should really just have one theme installed.
- Install and Activate Your Theme
When using an external theme, one you downloaded or purchased outside of the WordPress themes repository, you’ll need to upload it by following one of these options:
- a. Upload through WordPress: From the WP menu go to Appearance » Themes » Add New » Upload Theme. Then, choose the [theme-name].zip file.
- b. Upload through FTP: Unzip the [theme-name].zip file and upload the theme folder using your preferred FTP client into the wp-content/themes at your domain.
Once you have uploaded the theme click Activate (Appearance » Themes » Your uploaded theme).
Another option is to look for a theme in the WordPress Theme Directory, which has a collection of themes you’ll be able to install right from your dashboard.
Navigate to Appearance » Themes » Add New, and you’ll see the available themes from the repository. Just select the one you like and click Install.
- Remove Unused Themes
WordPress comes with its own default themes known as the Twenty-Something series. After you install and activate the theme you’re going to use, do not leave other themes occupying the space in your install folder. Delete all other themes.
Go to Appearance » Themes, click on the theme you want to remove. It’ll open a lightbox, and on the bottom right corner you’ll find the Delete link.
10 – Upload a Favicon
A favicon is an icon that represents your site across the web and devices. It’s a part of your site’s visual identity and helps people to easily and quickly recognize your website.
Since WordPress 4.3, you can add a favicon (or a Site Icon) from the WordPress dashboard.
Go to Appearance » Customize » Site Identity tab. Click on the select file button and upload the image you want to use as site icon.
According to WordPress, icons must be square, and at least 512 pixels wide and tall.
11 – Remove Sample Content
When you install WordPress on your domain, you’ll notice it comes with a sample post (the famous “Hello World!”) and a sample page created. That’s so you can already see something in your site instead of seeing it kind of empty and broken. But we never use these sample content.
Instead of leaving them there and taking a chance on forgetting they even exist when your site is ready, go and trash them right away.
To remove the sample post: go to Posts and hover on the Hello World post. You should see the Trash link. Click on it, and then go to “Trash”, hover the same post and hit Delete Permanently.

To remove the sample page: go to Pages and hover on the Sample Page page. You should see the Trash link. Click on it, and then go to “Trash”, hover the same post and hit Delete Permanently.
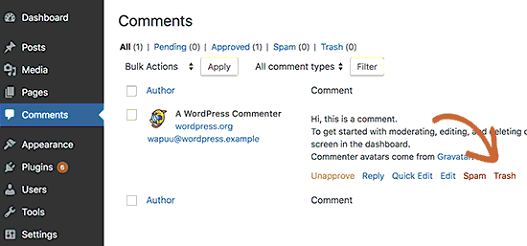
Lastly, visit the Comments page and then delete the default comment.
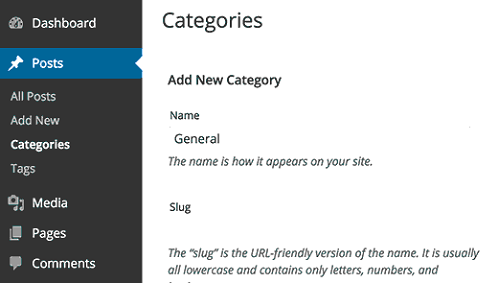
12 – Add Categories and Change the Default One
The default posts category when you install WordPress is called Uncategorized.
If you don’t set a specific category for the posts you create, they will automatically be archived under the default category.
To change the default category name go to Posts » Categories, hover on Uncategorized and click Edit.
Don’t forget to change its slug as well.
If you already have some category names in mind then create them now. That way you’ll be able to plan the editorial categories in advance, and won’t need to figure them out while writing a new post and the time to assign it to a category comes.
For that, go to Posts » Categories and add them right there. If you want, you can write a description for each one. Some themes will display that description in the archive page, and it’s also a good thing for your SEO.
After that, go to Settings » Writing page. Here you will see the default category option, you can go ahead and select the new category you created earlier.
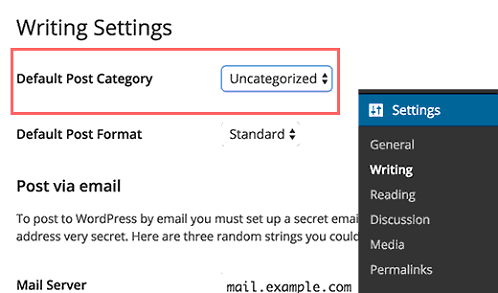
Finally, you can go to Posts » Categories page and delete the ‘Uncategorized’ category.
13 – Change Default Widgets on Sidebar
Most themes usually come with at least one widgetized area that is usually the main sidebar displayed next to your posts. Other themes may come with more sections for widgets like the footer.
By default, WordPress places some widgets on the main sidebar: Search, Archives, Recent Comments, Recent Posts and Categories widgets.
You can decide if you are going to keep these widgets or what exactly you want to put there. For that, navigate to Appearance » Widgets and change the default settings.
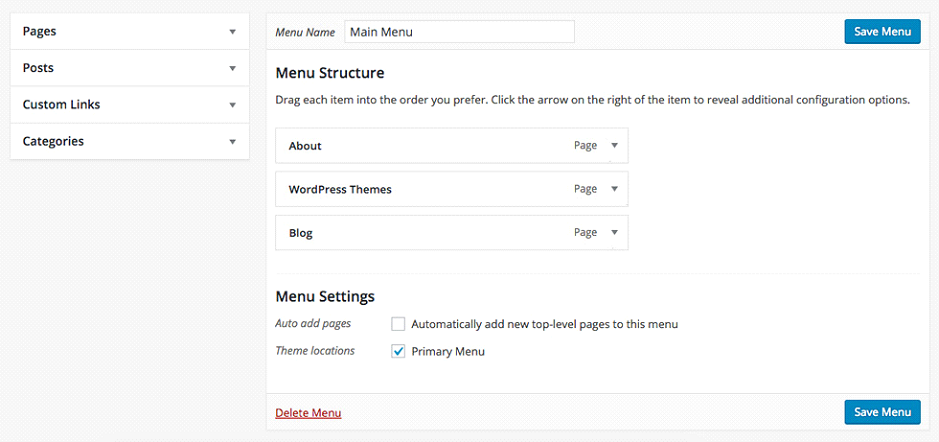
14 – Create a Custom Menu
By default, most themes will take the existing pages on your site and place their links in the navigation area in your site. But this is not the prettiest way to build a navigation menu for your website.
The Menus screen found under Appearance » Menus enables a user to create custom navigation menus and place them in different locations over the site.
-
- Creating a Custom Menu instead of leaving the default page links in your header will let you:
- Drag, order, reorder and rename menu items.
- Create sub-menus.
- Create menu items that are not pages, like custom links, posts and categories.
- Use, afterwards, the same menu on different places, like widgets.
- Customize the menu items by playing with the Link Target, CSS Classes, Description.
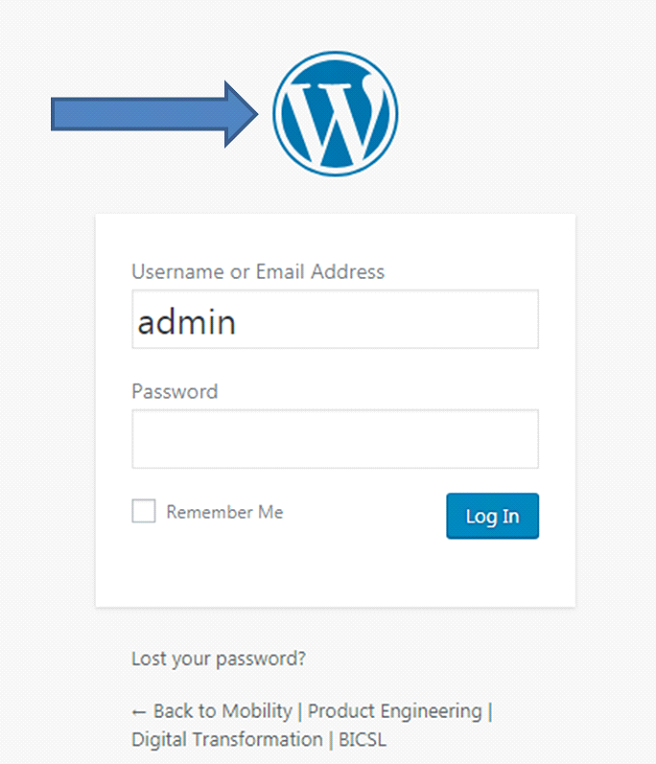
15 – Change Default Admin User
Make sure you change the admin username to a unique one. Leaving the admin username may be disastrous for the security of your site.
Also change your password to a more complex one.
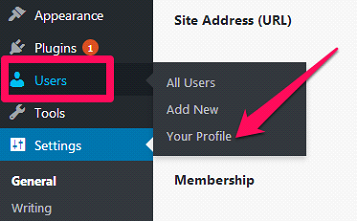
16 – Complete Your Profile
Make your WordPress profile match who you are.
Go to Users » Your Profile. There you’ll be able to enable/disable the Visual Editor when writing posts and pages, to select an Admin Color Scheme, to decide if you want to show or not the Toolbar when viewing your site.
You can fill in your details and decide how to show them.
Insert your first and last names, and then select a “Display name publicly as…” option.
This will apply to every place in your site where your name is displayed: author archive page, author name in posts, user name in forums, etc.
You can also add your Contact Info and a Biographical Info. Depending on the theme, these may show up in different locations.
17 – Get a Gravatar
Your name, contact info and bio are set up. But what about having a profile picture?
WordPress uses a specific type of avatar called Gravatar (Globally Recognized Avatar). Gravatars follow you around the web and automatically appear when you post a comment on a WordPress site or sign up on a WordPress site with your email account.
To create your Gravatar go to gravatar.com. You’ll be able to register an account based on your email, and upload an avatar to be associated with the account.
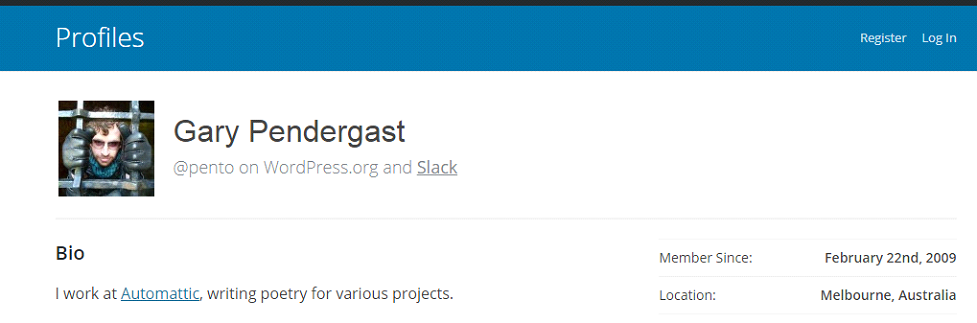
Depending on the theme, Gravatars may be displayed next to your author info in a post you wrote, on a comment you made or a forum topic you’ve responded.
18 – Add Other Authors
Navigate to Users » Add New and create the profiles for more authors. You’ll be required to fill in Username and Email.
A Password will be automatically generated for you.
In the same screen, you can decide if you want to send the new user an email notification about their account and the role he/she is going to have in your website.
Remember that the email address you set is the one that brings the person’s Gravatar, so you may want to use for your authors the email that they use for their account at gravatar.com. Or you can use another email address but then remind them to add that email to their Gravatar account.
19 – Delete Unused Default Plugins
WordPress comes with two already installed plugins: Hello Dolly and Akismet. Delete the Hello Dolly.
Sometimes when getting a WordPress installation from your hosting service, there might be other plugins installed already. Make sure you check them out and see if you really need them. If not, remove them from your site.
20 – Install Anti-Spam Plugins
Spam comments can be quite problematic. Most of them contain links to malicious websites known for distributing malware. Spam comments can affect your search rankings and your website’s reputation.
You can enable “comment moderation” in WordPress to prevent any comment appearing without approval. However, as the quantity of spam grows you will be spending considerable time moderating comments. You can avoid it by installing some useful plugins.
Akismet
Akismet is a plugin that checks your comments to see if they look like spam or not and lets you review the spam it catches under your site’s “Comments” admin screen.
It comes already installed with your WordPress installation. You’ll need an Akismet.com API key to use it which is free for personal sites. Activate the plugin and fill in your API key.
Antispam Bee
Another popular solution to fight spam. This free plugin will help you block unwanted comments on your site.
21 – Install SEO Plugins
Yoast SEO
One of the best and most complete Search Engine Optimization solutions for WordPress. The Yoast SEO plugin guides you through some of the settings needed in order to optimize your site. It’ll help you write better content that cares for keywords and readability. It’ll also generate a sitemap of your site.
Google XML Sitemaps
If you didn’t install Yoast SEO or if your SEO plugin doesn’t automatically creates a sitemap, install Google XML Sitemaps. This plugin will generate a special XML sitemap which will help search engines to better index your site by understanding its structure. In addition, it notifies all major search engines every time you create a post.
22 – Install Analytics Plugins
Google Analytics
Every site, as little as it can be, needs statistics. Google Analytics is a free service that tracks all sorts of insights about your website’s visitors, so you can improve wherever necessary to get better results and keep them coming back.
First, create an account at Google Analytics, and then add Google Analytics code on the website.
if you are not using a custom developed theme, then you can get a plugin that will install the code for you. These are few options:
– Google Analytics by MonsterInsights
– Google Analyticator
– Google Analytics
23 – Install Cache Plugins
Caching is the best way to optimize WordPress sites.
WordPress is a CMS that serves dynamic websites; every time a page is loaded the server needs to process it all over again. That means the page is going to consume a specific amount of server resources which will affect the load speed, and the amount of pages that can be served at any specific time.
When you use caching the server returns a “static page” for the requested URL, which uses way less resources and improves both the loading speed and the amount of pages per minute you can serve.
Unless your site runs on a server that is already using some way of caching and even then, plugins are the fastest way to get started with caching.
Some popular cache plugins are as follows:
- WP Super Cache (WP Super Cache) is the most popular option between cache plugins. It’s pretty straightforward to setup and has really good speed results (achieved by the technologies it uses to cache the pages). On the downside, the most optimized part of this can’t be used for logged in users. If you don’t need to present content to logged in users, this plugin might be the one to go with.
- W3 Total Cache (W3 Total Cache) has similar performance results than WP Super Cache but with a much more complicated setup environment but it has a lot of advanced options that will let you modify almost everything in the way it works.
- WP Rocket (WP Rocket) (Paid one) is the one of these three that has the fastest results according to several benchmarking tests. The setup is extremely easy and -probably as a consequence of being a paid one- it has a really good support team behind.
24- Install Security Plugins
WordPress itself is a very secure platform. However, there’re some plugins that can help in adding some extra security to your site. And if unfortunately your site gets hacked and you need to recreate it, it’s always a good idea to have regular backups of your database nearby.
- The Wordfence (WordFence) security plugin provides free enterprise-class WordPress security, protecting your website from hacks and malware. The plugin scans your site and alerts you quickly if your site is compromised.
- All In One WP Security (All In One WP Security) is a free, comprehensive, user-friendly, all in one WordPress security and firewall plugin. It reduces security risk by checking for vulnerabilities and by implementing and enforcing the latest recommended WordPress security practices and techniques.
25 – Install BackUp Plugins
- WordPress Backup To DropBox – This free plugin keeps your WordPress website, its media and database backed up to Dropbox on a regular basis. You can choose a day, a time and how often you wish your backup to be performed, and where it’ll be saved within Dropbox.
- BackupBuddy – It allows you to easily schedule daily, weekly, or monthly backups. It can also automatically store your backups in Dropbox, Amazon S3, Rackspace Cloud, FTP, Stash (their cloud service), and even email it to yourself.
- UpdraftPlus -UpdraftPlus is a free WordPress backup plugin. It allows you to create complete backup of your WordPress site and store it on the cloud or download to your computer.
26 – Install a Social Media Plugin
Whenever you publish new content, you want to make it easy for people to share. There are several social sharing plugins you can install.
- Sassy Social Share – Sassy Social Share is an easy to use social media plugin for WordPress with tons of options. It comes with support for many different social media websites, and you can add buttons in post content as well as a sticky floating social menu.
- Shared Counts – Shared Counts is a fast and easy to use social media plugin for WordPress. There are multiple button styles, and you can choose where to show the button (before or after the content or manually).
- AddtoAny – AddtoAny is a social sharing tool also available as a WordPress plugin. It offers many social media platforms, floating and standard social sharing bars, and a universal sharing menu.
27 – Setup Related Posts Plugin
The related posts plugin will help keep visitors on your website longer, by showing them related content.
As you start creating more unique content they will browse the related posts. This in turn will improve your bounce rate.
You can use Related posts for WordPress (https://wordpress.org/plugins/related-posts-for-wp/) or WordPress Related Posts (https://wordpress.org/plugins/wordpress-23-related-posts-plugin/)
28 – Internal Link Checker
We need to make sure that links in blogs are not broken, otherwise it can impact SEO badly. There are plugins like Broken Link Checker, which can automate this process.
It scans your blog, and if it detects any type of broken links or images. It notifies you via your dashboard and email. You can then take action and correct the issue.
29 – Setup a Contact Form
The visitors of your website may want to contact you. So, make it simple for people to reach out to you.
Contact Form 7 is a free and popular WordPress plugin with more than a million downloads. You can use it to create a simple contact form.
The Contact Form 7 allows you to create fields like email addresses, names, subjects, and messages. You can even add captcha to prevent spammers from filling the form.
30 – Optimize Images
High-resolution images have a major impact on load time. They slow down page speed because of their large file size. It is advisable to reduce the image size without losing the quality. Optimizing images also boosts your SEO.
To solve this issue, Image Optimization plugins come to rescue. They compress images, thus optimizing them. To name a few of them: EWWW Image Optimizer, WP-Smush, Short Pixel Image Optimizer, Imagify.
31 – Brand Up Your Login Page
It is a good practice to put your brand on Login page. It gives a more professional look to the site.
There are many ways to do that:
- With a plugin: Uber Login Logo or Custom Login may be good options.
- Through custom code: Learn about it here.
32 – Modify Your Footer
Depending on the theme you choose to use, you can modify your footer.
You can add copyright date, authors, company name as well as links to your affiliate disclaimer and privacy page.
33 – Setup Google Webmasters
This is a very useful tool to see if your website has any type of crawl errors and security issues.
Google will even show you how many pages are indexed in the search engines.
Head on over to Google Webmasters and create an account.
You will be asked to verify your domain to prove you are the owner. Choose your method of verification and follow the prompts.
34 – Add RSS to Feedburner
Really Simple Syndication or RSS is way to syndicate your content. This makes it easy for people to read it in their mailboxes, feed reader or other devices.
You can use Google Reader, it’s a free service and extremely easy to setup.
35 – Create Your About Me Page
When you start blogging no one knows who you are. It’s up to you to show them, this is where the about me page comes in.
Don’t forget to add some pictures of yourself. People want to get to know you and find out if you’re trustworthy.
36 – Create A Privacy Page
The privacy page allows people know what you are going to do with their data. A privacy page is important to add to your WordPress blog.
It is now more important after the European Union’s GDPR law.
There are several plugins you can use to create a terms of service and privacy page, for example you can use this free plugin. After you create the pages, delete the plugin as you won’t need it anymore.
Don’t forget to write a blog disclaimer for your blog, so you can be protected legally.
37 – Install Login Limit Plugin
Another great thing you can do for your WordPress blog is to install the Limit Login Plugin. This plugin will block hackers from continually attempting to login to your site.
It will lock out anyone who is unsuccessful of logging into your account after a certain number of times.
38 – Create A Child Theme
Before you start making any real changes to your WordPress blog, be sure you create a child theme. A child theme will protect your WordPress blog from losing any of the CSS styles you add to it.
Some examples of the child theme creator plugins are: One Click Child Theme and the Child Theme Creator.
39 – Start Building Your Email List
Anyone who’s been online for awhile will tell you that their biggest regret is that they didn’t build their email list right away.
Don’t wait until you start getting traffic. If you start creating great content, you will eventually start getting visitors and you want to give them the option of signing up to your email list.
Some of the Email list plugins are GetResponse, ConvertKit and MailChimp.
40 – Change Or Delete Post Revisions
By default WordPress is setup to keep all your post revisions. It is a good practice to delete these revisions.
You can use plugins like, Better Delete Revision or Revision Control.
41 – Let The Search Engines Know Your Blog Is Live
Keep the search engine visibility off while you are Installing the WordPress, however when you are ready to publish then turn it back on to let the Google Bots know your content is ready to be crawled.
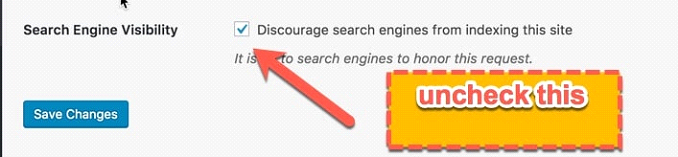
Head on over to your Settings » Reading and uncheck the box when you’re ready to go live.
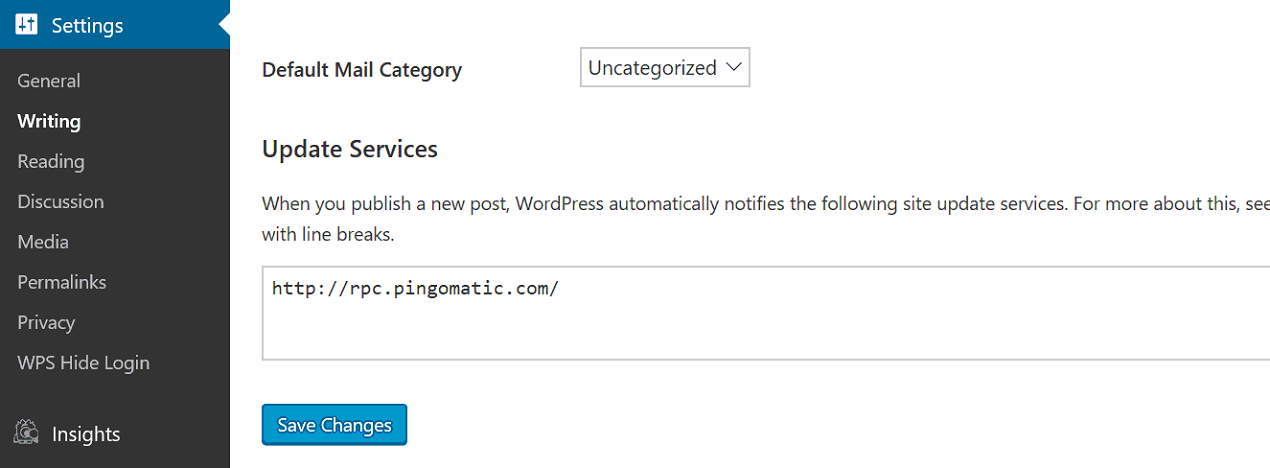
42 – Populate WordPress Ping List
Whenever you publish a new post or update existing posts, WordPress automatically notify the site of your ping list which helps search engines pick up and index your posts faster.
Some important ping sites are as below:
http://blogsearch.google.com/ping/RPC2
http://bblog.com/ping.php
http://bitacoras.net/ping
http://blog.goo.ne.jp/XMLRPC
http://blogdb.jp/xmlrpc
http://blogmatcher.com/u.php
http://bulkfeeds.net/rpc
http://coreblog.org/ping/
http://mod-pubsub.org/kn_apps/blogchatt
http://www.lasermemory.com/lsrpc/
http://ping.blo.gs/
http://ping.bloggers.jp/rpc/
http://ping.feedburner.com
http://ping.rootblog.com/rpc.php
http://pingoat.com/goat/RPC2
Login to your WordPress dashboard. Go to Writing under settings tab and scroll down to update services and add all the above ping list.
43 – Disable Directory Browsing
WordPress blog by default has the Directory Browsing enabled. Directory browsing allows you to see folders and subfolders for your website.
If Directory Browsing is enabled hackers can find a way to your blog by browsing your directory looking for a way to sneak in through a plugin or theme which you have installed.
While some web hosting companies disables Directory Browsing by default. Your web hosting might keep this option up to you.
To test it, enter the below link into your browser. Be sure to use your domain name.
https://Yourdomainname.com/wp-includes/
If you see a list of directory files then you need to disable Directory browsing.
To disable directory browsing all you need is to edit your “.htaccess” file and add the below line code
Options -Indexes
Take a copy of your .htaccess file before you edit it
44 – Test your website on Mobile screens and various other screen sizes
For good user experience and good SEO score, it is important that your WordPress website is mobile responsive and work well on all the screen sizes.
Test your website on real mobile phone and other devices as much as possible.
Also please use screen simulator to cover wide range of screen sizes. For example, you can download a screen simulator extension “Screen Resolution Tester” from chrome web store and run your website on various screen sizes.
45 – Enable CDN for your Website
CDN helps you in storing your content on country specific servers. This speeds up loading time for your website.
You can try to activate CloudFlare for your website. It is one of the best CDN available today.